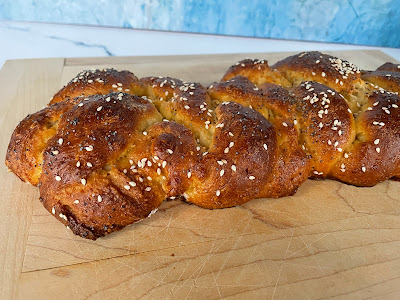
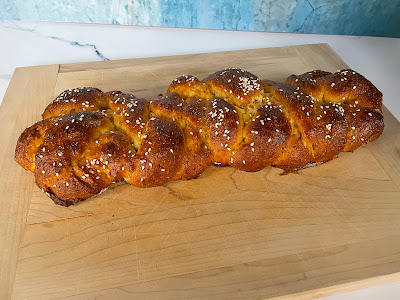
When my mother-in-law visited us for Thanksgiving, she requested that I make her gluten-free challah. She likes the blog Gluten-Free on a Shoestring, so I used their challah recipe. It calls specifically for Better Batter all-purpose gluten-free flour, so I got some online (though there’s a recipe for a sort of equivalent on the original link). This challah is pareve in addition to being gluten-free. It wasn’t hard to make, though of course the dough is more difficult to work with than wheat dough, so I couldn’t make a nice braid like I wanted. Nevertheless, the bread came out wonderfully! It was perhaps slightly gummy compared to “regular” challah, but absolutely delicious, and much better than anything my mother-in-law had been able to find in stores.
I think that gluten-free bread gets stale more quickly than wheat bread; it’s important to keep leftovers in an airtight container, or slice and freeze the bread. It would also make great bread pudding!
(Another quick recommendation, while I’m at it: I also tried a biscuit mix by Daddy-O. It’s made with a mixture of corn starch, white and brown rice flour, tapioca flour and potato starch. It made great biscuits very quickly!)
1 ¾ cups (245 g) Better Batter all-purpose gluten free flour blend
⅝ cup (75 g) tapioca starch/flour, plus more for sprinkling
1 ⅔ teaspoons (5 g) instant yeast
¼ cup (50 g) granulated sugar
2 tsp. (6 g) kosher salt
¾ cup lukewarm water
4 Tbsp. (56 g) extra virgin olive oil
3 (75 g) egg yolks, at room temperature
2 Tbsp. (42 g) honey
egg wash (1 large egg, at room temperature, beaten with 1 Tbsp. water)
poppy seeds or sesame seeds, for sprinkling (optional)
In the bowl of a stand mixer fitted with the paddle attachment, place the flour blend, tapioca starch/flour, instant yeast, granulated sugar, and salt. Whisk to combine well.
Add a bit more than ½ cup of the water, olive oil, egg yolks, and honey. Using the paddle attachment, beat vigorously.
With the mixer running, add as much of the remaining water as necessary for the dough to smooth out. (In a warm, humid environment, it may take a bit less than the full ¾ cup of water.) The dough mixture will come together in a clump and then smooth out and stick to the sides of the bowl. Keep beating until it begins to look whipped, and the color lightens a bit (about 6 minutes total).
Transfer the mixture to a lightly oiled bowl with a very tight-fitting lid. Place the container in the refrigerator, tightly sealed, for at least an hour and up to 2 days.
When you’re ready to bake, turn out the chilled dough onto a surface lightly dusted with tapioca starch/flour. Sprinkle the top lightly with more starch, and divide the dough into 3 equal portions.
Working with one piece at a time, knead the dough in your clean, dry hands, without adding any additional flour of any kind, pinching any seams that separate.
Begin working the dough into a cylindrical shape, pinching any gaps together, fanning your hands out toward the edges to lengthen the strand. Rolling back and forth, create strands about 15 inches long from end to end that taper slowly from the center to each end, with very tapered ends. Sprinkle each strand lightly with more tapioca flour on the outside of the cylinder to smooth the surface, then set it aside.
Place the 3 strands on a lightly floured surface parallel to one another and about 5 inches apart from one another. Gather the tapered ends on one side together, pinch them securely and tuck the very end under the knot.
Plait the 3 strands as you would any 3-strand braid. Do not pull the strands, as they’ll fray. Just place them on top of one another as you work toward from one end to the other. (Honestly, this was a bit hard, given that the dough is gluten-free.)
Placing your hands carefully under each side of the braided loaf, carefully lift the braid onto a lined baking sheet. Press the finished braid gently on each ends toward center to shorten the length a bit. Sprinkle the top of the braid lightly with more tapioca starch and brush off excess from the valleys between braids.
Cover the braid securely with plastic wrap, and place the loaf in a warm, draft-free location. Allow the loaf to rise until it’s at least 150% its original size (anywhere from 45 minutes to hours). If any of the tops of the strands begin to separate from one another as the dough rises, try to smooth and pinch them closed. When the dough is nearing the end of its rise, preheat your oven to 350 °F.
Uncover the risen bread and brush the tops and sides of the braids very generously with the egg wash. Avoid letting the egg wash pool in between the braids. Sprinkle the top evenly with the optional seeds.
Place the baking sheet in the center of the preheated oven. Bake for 30 minutes, rotate the baking sheet 180° and reduce the oven temperature to 325 °F.
Continue to bake for about 15 minutes, or until the bread bounces back when pressed on a center braid and the internal temperature is at least 190 °F on an instant read thermometer.
Remove the bread from the oven and allow it to cool on the baking sheet for at least 20 minutes before transferring to a wire rack to cool completely. Slice and serve.


.JPG)
.JPG)


No comments:
Post a Comment