Monday, August 31, 2020

Chicken Shawarma with Cucumber Relish

This is one of those times when I wanted to make chicken, but couldn’t quite decide between two recipes, so I used part of each. I ended up combining this recipe for chicken shawarma with this cucumber relish as a garnish. I changed the relish a bit by using mint instead of dill (my preference) and a shallot instead of red onion (my pantry), but I really question the instructions to salt the cucumber ahead of time and let it sit, because then it lets out a bunch of water in the bowl and that’s not great. And obviously I used tortillas instead of pitas, because Texas. Despite everything, we really liked this dish!


For the cucumber relish

1 English cucumber, halved lengthwise and thinly sliced (about 4 cups; I peeled mine)

1 pinch salt

1 cup seeded, finely diced tomato

½ cup finely diced red onion (I used a shallot)

6 Tbsp. coarsely chopped and pitted black olives (I omitted those because I hate them)

4 Tbsp. coarsely chopped fresh parsley

2 Tbsp. coarsely chopped fresh dill (I prefer mint)

1 garlic clove, minced

4 Tbsp. extra virgin olive oil (I used 2 Tbsp.)

4 tsp. fresh lemon juice (I used 2 Tbsp.)


(As stated above, I’d probably skip this step next time.) Lay cucumber slices in a sieve placed over a bowl and sprinkle with pinch of salt. Leave for about 30 to 40 minutes, or until cucumbers soften and their liquid begins to drain into the bowl. Stir occasionally.

Combine the tomato, onion, olives, parsley, dill, garlic, olive oil and lemon juice in a medium bowl. Stir in drained cucumbers, then cover the bowl and refrigerate for 1 to 2 hours or until serving.


For the chicken shawarma

2 Tbsp. olive oil

2 cloves garlic, minced

1 ½ tsp. kosher salt

¾ tsp. freshly ground black pepper

½ tsp. ground cumin

¼ tsp. ground allspice

¼ tsp. ground cinnamon

¼ tsp. ground turmeric

2 ½ lbs. boneless, skinless chicken thighs or chicken breast tenders

8 pitas, lavash, or flatbread

2 cups shredded romaine lettuce

cucumber relish (see above) or a mix of diced cucumber and tomato

lactose-free yogurt-based sauce (such as tzatziki) or plain yogurt, for drizzling


Stir the oil, garlic, salt, pepper, cumin, allspice, cinnamon, and turmeric together in a large bowl to form a paste. Add the chicken and toss to coat; let marinate at room temperature while the oven heats, at least 20 minutes, or cover and marinate in the refrigerator overnight. Arrange a rack in the middle of the oven and heat to 425 °F.

Line a rimmed baking sheet with parchment paper or oiled aluminum foil. Place the chicken on the baking sheet in single layer. Roast until browned and cooked through, about 25-30 minutes.

Let cool 5 minutes. (If using pita or flatbreads, stack them, wrap in aluminum foil, and place in the turned-off oven to warm through.) Thinly slice the chicken crosswise.

To serve, divide the chicken among the pita, lavash, or flatbreads. Top with the lettuce and cucumber relish, and drizzle with sauce. For pitas, fold up the sides like a taco. For lavash or flatbreads, position with the long side facing you. Fold the bottom up and over the filling, then fold one side in towards the center over the filling. Continue rolling up tightly like a burrito.


Saturday, August 29, 2020

There are new chocolates in town

 I realized I haven’t talked about chocolate in a while, and I had photos just sitting around in my blog folder, gathering virtual dust, so…

First, there was Guittard’s 64% cacao tasting chocolate, L’Harmonie, that was absolutely lovely. It’s dairy-free (though could be cross-contaminated with milk) and has just the right amount of sweetness to me. Unfortunately, I haven’t seen it in stores in a while.


My current go-to is Ghiradelli’s 60% cacao tasting chocolate, Evening Dream, which is really great. It contains milk fat but no lactose. It’s rich enough that sometimes, just one square (broken into little pieces) is enough for the evening, and it feels a bit refined – probably because it’s quality cocoa and not too much sugar. I love it!


I still can’t find my favorite Green & Black’s dark chocolate with sea salt anywhere, but they started making my Godiva dark chocolate with sea salt again, though the packaging has changed since I last saw it. I actually couldn’t find it again for a while, but then I did something crazy: I ordered a box of 10 right from the website and got free shipping thanks to a promotion, so it was really good value! (Plus, it was shipped with ice, so nothing melted on the way.)


Finally, there’s BE Chocolat, a Belgian-chocolate company started by French Canadians in Connecticut (!). I ordered from them for Easter, and the chocolate was REALLY good. While I was at it, I also got two of their rosemary raspberry truffles, which were exquisite. The rosemary is very subtle, but detectable, and pairs well with the raspberry and dark chocolate. The chocolate came with cold packs, but I still probably wouldn’t order in the middle of summer in Texas. That being said, since the shipping is relatively fast (assuming USPS is still operating as it should), you can actually wait for a cooler weather forecast to place your order, which is what I did.


Wednesday, August 26, 2020

Riz frit au boeuf et à la courge

 J’ai fait ce riz frit à la courge de Ricardo, en changeant quelques petites choses, et ça a été un succès! C’était à l’origine présenté comme une recette pour boîte à lunch, mais j’ai préféré la servir au souper – remarquez qu’on peut très bien emporter les restes au chaud dans un thermos le lendemain!


2 tasses (280 g) de courge butternut coupée en dés (environ ½ courge)

2 c. à soupe d’huile d’olive

1 tasse de bouillon de poulet

2 lb de bœuf haché mi-maigre

1 c. à thé de curcuma moulu

½ c. à thé de poudre de cari

4 gousses d’ail hachées

4 c. à soupe de sauce soya

4 tasses de riz basmati cuit (à partir de 1 ½ tasse de riz non cuit)

2 oignons verts ciselés

quartiers de lime, au goût


Dans une poêle antiadhésive, à feu élevé, dorer les dés de courge dans la moitié de l’huile (1 c. à soupe) 5 minutes. Ajouter le bouillon de poulet (j’ai aussi ajouté ½ tasse d’eau ainsi que du sel et du poivre) et poursuivre la cuisson jusqu’à ce que le bouillon soit complètement absorbé (j’ai couvert la poêle et j’ai vérifié que la courge était tendre). Réserver sur une assiette.

Dans la même poêle, dorer la viande avec le curcuma et le cari dans le reste de l’huile en l’émiettant à l’aide d’une cuillère de bois, soit environ 5 minutes. Incorporer l’ail et la sauce soya. Cuire 1 minute. Saler et poivrer, au goût (je n’ai mis qu’un peu de poivre, puisqu’il y avait déjà de la sauce soya).

(Ici, j’ai transféré le tout dans un wok, parce que je manquais de place dans ma poêle.) Ajouter le riz et la courge. Poursuivre la cuisson 1 minute. Parsemer des oignons verts et servir avec les quartiers de lime.


Tuesday, August 25, 2020

Gâteau à la lime, à la noix de coco et aux amandes


Je sais que j’ai mis en ligne plusieurs recettes avec des saveurs de lime et de noix de coco depuis ce printemps, mais que voulez-vous, c’est bon! Ce gâteau est tout simple à faire, et je vous jure qu’en le mangeant, j’ai complètement oublié qu’il ne contenait pas de gluten – vraiment, je n’en revenais pas! C’est absolument délicieux.

6 œufs
1 ou 2 limes
1 tasse d'amandes moulues (100 g)
½ tasse de noix de coco râpée (40 g)
1/3 tasse de farine sans gluten (40 g)
1 c. à thé de levure chimique
½ c. à thé de sel
¾ tasse de sucre (180 g)
1 c. à thé d'extrait de vanille
1 tasse de sucre glace tamisé (150 g)

Préchauffer le four à 350 °F et enduire de beurre un moule à charnière de 10 po (25 cm) de diamètre.

Séparer les jaunes d'œufs des blancs et verser dans deux bols. Réserver.

Râper 3 c. à soupe de zeste de lime et réserver.

Dans un bol de grosseur moyenne, mélanger à la fourchette la poudre d'amande, la noix de coco, la farine tamisée, 1 c. à thé de zeste de lime, la levure chimique et le sel. Réserver.

Battre les jaunes d'œufs au batteur électrique, à vitesse moyenne. Incorporer graduellement le sucre, puis la vanille. Augmenter la vitesse et fouetter jusqu'à ce que la préparation ait doublé de volume. Incorporer la préparation aux amandes à la spatule.

Laver et assécher les batteurs. Battre les blancs d'œufs à grande vitesse, jusqu'à la formation de pics fermes. Incorporer le tiers des blancs dans la préparation aux jaunes d'œufs et battre jusqu'à homogénéité. Incorporer le reste des blancs à la spatule, jusqu'à ce qu'il ne reste plus de traces blanches. Verser dans le moule et égaliser le dessus.

Cuire au centre du four de 30 à 40 minutes ou jusqu'à ce qu'un cure-dent inséré au centre en ressorte sec. Sortir du four et laisser reposer sur une grille 10 minutes. Passer un couteau entre le gâteau et le pourtour du moule. Laisser refroidir, puis transférer sur une assiette de service.

Préparer le glaçage comme suit : dans un bol de grandeur moyenne, presser 1 lime pour obtenir 2 c. à soupe de jus. Ajouter le sucre glace et le reste du zeste. Étendre sur le dessus du gâteau et laisser couler sur les côtés. Servir de préférence à température ambiante.


Monday, August 17, 2020

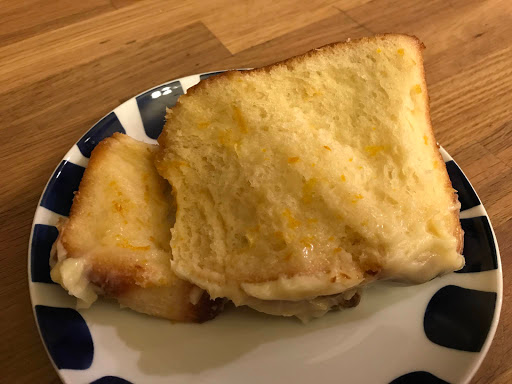
Lemon Pull-Apart Cake

When I came across this recipe recently, I decided that I had put it off long enough and I just had to make it. It’s a great weekend breakfast (either make it the night before, or put in the fridge for the second rise and let it come to room temperature before baking it in the morning). This was a hit with my family.

I found the assembly complicated. This reviewer put it best when she said that “the directions were specific to the point of confusion”. When I realized I had made a mistake, I actually had to take my layers of dough out of the pan, cut them again and then cram them back in, which is why they are going in all directions and make the loaf look more like a challah than a neat series of slices. Oh well… It tasted just as good! Just try to remember that we’re supposed to cut the dough into 5 strips, stack them, then cut again into 6 strips and stack again, for a total of 30 layers.

Note that I didn’t have quite enough lemons to make it as written, so I used more orange zest to compensate (I had about 2 tablespoons of each). Also, it may be hard to gauge whether the loaf is done baking – I’d recommend tenting it with foil maybe halfway through, to prevent it from browning too much, and checking that’s it done by using a thermometer to make sure it has reached an internal temperature of 200 °F or so.


For the pull-apart sweet dough
about 2 ¾ cups all-purpose flour, plus more for kneading
¼ cup granulated sugar
2 ¼ tsp. instant yeast (1 envelope)
½ tsp. salt
1/3 cup lactose-free whole milk
4 Tbsp. lactose-free butter
¼ cup water
1 ½ tsp. vanilla extract
2 large eggs, at room temperature

For the lemon filling
½ cup granulated sugar
3 Tbsp. finely grate lemon zest (from 4 to 6 lemons)
1 Tbsp. finely grated orange zest
4 Tbsp. lactose-free butter, melted

For the cream cheese icing
3 oz. lactose-free cream cheese, softened
1/3 cup confectioners’ sugar, sifted
1 Tbsp. lactose-free whole milk
1 Tbsp. fresh lemon juice

To make the pull-apart sweet dough
Stir together 2 cups (9 ounces) of the flour, sugar, yeast, and salt in the bowl of a stand mixer.

In a small saucepan, heat the milk and butter over low heat just until the butter is melted. Remove from the heat, add the water, and set aside until warm (120 to 130°F), about 1 minute. Add the vanilla extract.

Pour the milk mixture over the flour-yeast mixture and, using a rubber spatula, mix until the dry ingredients are evenly moistened. Attach the bowl to the mixer and fit the mixer with the paddle attachment. With the mixer on low speed, add the eggs, 1 at a time, mixing just until incorporated after each addition. Stop the mixer, add ½ cup (2 ¼ ounces) flour, and resume mixing on low speed until the dough is smooth, 30 to 45 seconds. Add 2 more tablespoons flour and mix on medium speed until the dough is smooth, soft, and slightly sticky, about 45 seconds.

Sprinkle a work surface with 1 tablespoon flour and turn the dough onto the flour. Knead gently until the dough is smooth and no longer sticky, about 1 minute, adding an additional 1 to 2 tablespoons flour only if the dough is unworkably sticky. Place the dough in a large greased bowl, cover the bowl tightly with plastic wrap, and let the dough rise in a warm place (about 70°F; I do this in my microwave with the door ajar, though I haven’t taken its temperature) until doubled in size, 45 to 60 minutes. Press the dough gently with a fingertip. If the indentation remains, the dough is ready for the next step.


To make the lemon filling
While the dough is rising, in a small bowl, mix together the sugar, lemon zest, and orange zest. Set aside. (The sugar draws out moisture from the zests to create a sandy-wet consistency, so don’t be alarmed when you see this.)

To assemble the cake
Lightly butter a 9-by-5-by-3-inch loaf pan.

Gently deflate the dough. On a lightly floured work surface, roll the dough into a 20-by-12-inch rectangle with a short edge facing you. Using a pastry brush, spread the melted butter generously over the dough. Cut the dough crosswise into 5 strips, each about 12 by 4 inches. (A pizza cutter is helpful here.) Sprinkle 1 ½ tablespoons of the zest-sugar mixture over 1 of these buttered strips. Top with a second strip and sprinkle it with 1 ½ tablespoons of the zest-sugar mixture. Repeat with the remaining strips and zest-sugar mixture, ending with a stack of 5 rectangles. Work carefully when adding the crumbly zest filling, or it will fall off when you have to lift the stacked pastry later.

Slice the stack crosswise through the 5 layers to create 6 equal strips, each about 4 by 2 inches. Fit these layered strips into the prepared loaf pan, cut edges up and side by side. (While there is plenty of space on either side of the 6 strips widthwise in the pan, fitting the strips lengthwise is tight. But that’s fine because the spaces between the dough and the sides of the pan fill in during baking.) Loosely cover the pan with plastic wrap and let the dough rise in a warm place (70 °F) until puffy and almost doubled in size, 30 to 50 minutes. Press the dough gently with a fingertip. If the indentation remains, the dough is ready for baking.

When the second rise is almost finished, adjust the oven rack to the center position and preheat the oven to 350 °F.

Bake the coffee cake until the top is golden brown, 30 to 35 minutes.(As per my note above, I recommend tenting the top with foil halfway through and using a thermometer to make sure the loaf has reached an internal temperature of 200 °F. Mine ended up a bit too dark for my liking.) Transfer to a wire rack and let cool in the pan for 10 to 15 minutes.


To make the cream cheese icing
In a medium bowl, with a rubber spatula, vigorously mix the cream cheese and sugar until smooth. Beat in the milk and lemon juice until the mixture is creamy and smooth.

Using a knife, loosen the loaf from the pan. Place a plate over the pan and invert the two, gently unmolding the loaf onto the plate. Place second plate on the loaf and invert again, leaving the lemon loaf right side up on the second plate.

Slip a sheet of waxed paper under the rack to catch any drips from the icing. Using a pastry brush, coat the top of the warm cake with the icing to glaze it. 

To serve, you can pull apart the layers, or you can cut the cake into 1-inch-thick slices on a slight diagonal with a long, serrated knife. If you decide to cut the cake, don’t attempt to cut it until it is almost completely cool.


Friday, August 14, 2020

One-Pan Sausage and Vegetables

To get over all that Fourth of July fare, or at any time of the year, if you want something healthy that your kids will like, I recommend chicken-lentil soup with jammy onions. In my opinion, though, the real hit was this one-pan sausage and vegetable dish. This was SO good! It’s definitely going into a rotation of dishes I make. Obviously, I recommend using really good sausage, whatever that means to you. There are enough vegetables in here that the kids can usually pick one they don’t dislike as much as the others, and if they like the sausage, you’re all set.

Let me give you two tips for this recipe: stick to a large pan (or two!) rather than a small one; this will ensure that the vegetables roast instead of steaming. Also, the potatoes in particular need to be cut into pieces smaller than the other vegetables so that everything is finished cooking at the same time.

I wrote down the spices I used below; I knew I wanted less paprika and more garlic powder than the original recipe recommended. I increased the amounts of sausage (from 9 ounces to 24 ounces) and potatoes (from 1 to 4) to make leftovers and avoid the need for a side; the amounts below make 6 generous adult servings, or a little more than 8 servings for a family of four with small children. You could also make a bit less and serve it with a side of quinoa or rice, but I feel like that defeats the purpose of a one-pan meal a bit.

4 small-to-medium red potatoes
¾ lb. green beans
1 large head of broccoli
2 large bell peppers (or 6 mini sweet bell peppers), assorted colors
2 large smoked sausages (I used 12-oz. uncured smoked pork sausages)
6 Tbsp. olive oil (or a bit less)
1 pinch Korean pepper (or red pepper flakes, to taste)
1 tsp. garlic powder
½ tsp. paprika
1 Tbsp. dried oregano
1 Tbsp. dried basil
salt and pepper, to taste
grated parmesan, to serve (optional, I didn’t use it)

Preheat the oven to 400 °F. Line two large sheet pans with foil or parchment paper.

Prep the vegetables: chop the red potatoes (into pretty small pieces, so they will be tender in time), trim the green beans and halve, chop the broccoli florets, chop the bell peppers into large squares, and coin the sausage in thick slices.

Place all the veggies and sausage on a sheet pan. Pour the olive oil and all the spices on top. Toss to evenly coat all the veggies and meat. (I prefer doing the tossing in a large bowl and pouring it out onto the baking sheets after.)

Bake 15 minutes, remove from the oven, and stir all the veggies around with a spatula. Return to the oven and bake for another 10-15 minutes or until vegetables are crisp tender and sausage is browned.

If desired, sprinkle freshly grated parmesan cheese over the veggies and sausage as soon as they come out of the oven.


Tuesday, August 11, 2020

Fourth of July

 This summer, we celebrated the Fourth of July as Americans for the first time (and, because of the pandemic, we stayed home this summer, so we were actually in the U.S. that day, and it was great). We decided to make an American menu with hot dogs and potato salad for lunch, and burgers with flag cake for dinner. I don’t really have a potato salad recipe to recommend; I had previously tried this “all-American” recipe but disliked it, so I eyeballed my mother’s recipe (essentially small new potatoes, mayonnaise, Dijon mustard, shallots, salt, and pepper). I also tried these all-natural red, white and blue popsicles, but us grown-ups were severely disappointed, so next time we’ll just make an exception and buy the sugar-laden, artificially colored ones.

Things that I CAN recommend, though, are hamburgers, “red drink” and flag cake! I was looking through my burger recipes, still surprisingly disappointed from having made maple-bacon pork burgers with coleslaw earlier this year, when I settled on bacon burgers with bacon onion balsamic jam. And, Oh. My. God. I’m in love! These were amazing! I guess one might call them treif burgers, but hey, it’s all good. The quantities below are mine, to make 8 burgers. The jam can be made ahead of time and refrigerated, but try to let it come to room temperature a bit before serving.


For the bacon onion balsamic jam

4 thick slices (4 oz.) applewood-smoked bacon, sliced into ½-inch wide pieces

1 large red onion, halved and thinly sliced (about 1 ½ cups)

kosher salt and freshly ground black pepper

⅓ cup balsamic vinegar

½ tsp. Dijon mustard

⅓ cup water


For the burgers

4 thick slices (4 oz.) applewood-smoked bacon, finely diced

2 lbs. ground beef (85% or 90% lean)

1 tsp. Worcestershire sauce

¾ tsp. Morton’s kosher salt (1 ½ tsp. if using Diamond Crystal)

¾ tsp. freshly ground black pepper

8 hamburger buns, split

8 slices sharp cheddar cheese


To make the bacon onion balsamic jam

Heat a large sauté pan (that has a cover) over medium-high heat. Add the bacon and cook, stirring occasionally until browned but not crispy, about 8 minutes. Remove the bacon from the pan with a slotted spoon and let it drain on a paper towel-lined plate. Drain off all but 2 to 3 tablespoons of the bacon grease and then stir in the onions, about ¼ teaspoon salt, and a pinch of pepper. Cover the pan to cook the onions for 2 minutes. Uncover the pan and in a splash of water, scraping the bits off of the bottom of the pan with a spatula or wooden spoon. Recover the pan and cook the onions for 10 minutes, stirring occasionally, until the onions are soft and lightly browned.

After the onions have cooked for 10 minutes, stir in the balsamic vinegar, mustard, and water then return the bacon to the pan and bring the mixture to a simmer. Simmer uncovered until the sauce thickens and is almost completely absorbed, about 2 to 4 minutes (mine definitely took upwards of 4 minutes). At this point, the jam can be covered and refrigerated (you can make it up to 2 days in advance). If using immediately, set it aside in a bowl until ready to use.

To make the burgers

Using a fork, lightly mix the finely diced bacon with the ground beef, Worcestershire sauce, salt, and ground pepper in a medium bowl until the ingredients form a uniform mixture. Shape the burger mixture into eight equal-sized patties, about 1-inch thick.

Cook the burgers on a grill pre-heated to medium-high, about 4 to 5 minutes per side. Once you flip the burgers, add the cheese (if the cheese is thinly sliced, give it a minute or two on the second side before adding it). Once cooked to desired doneness, remove the burgers from the grill and set them aside to rest for 5 minutes before adding the topping, placing on the buns, and serving. No ketchup required.


As an accompaniment, I made my own version of chef Omar Tate’s red drink, which is a bit like natural Kool Aid. The main difference is that instead of using freeze-dried fruits and grinding them to a powder myself, I used freeze-dried fruit powder to begin with. I also used lemon juice instead of citric acid (less tart, but more convenient). We really liked this, and the Little Prince in particular has declared it his favorite drink ever! I did have to give a good stir to the pitcher before each serving, but you could also mix all the dry ingredients to make a homogenous powder and just mix individual servings together before serving.


For the red drink

2 oz. freeze-dried strawberry powder

1.25 oz. freeze-dried cherry powder

1 cup fine granulated sugar

1 pinch kosher or table salt

1 Tbsp. + 1 ½ tsp. citric acid (I used lemon juice)

8 cups water

Mix all the dry ingredients together thoroughly. Add water and lemon juice, and whisk until the sugar has dissolved, about 2 minutes. Serve chilled.


Finally, the flag cake. I have very fond memories of spending the Fourth of July holiday with an American friend of mine (and her family) when I was 17. The dish I remember most clearly was a flag cake, which was basically a white or yellow sheet cake covered with sweetened whipped cream and berries. I don’t have her recipe, so I did some googling and decided to make this American flag strawberry poke cake. I used Cool Whip because I didn’t want to deviate from the instructions, but next time, I’d use a sweetened vegan topping such as CocoWhip, vegan TruWhip, or Kineret (because sadly, Cool-Whip isn’t lactose-free). In my recollection, my friend’s cake had strawberries and blueberries, and so does this one, so of course that’s what I used. That being said, I think it would be prettier with raspberries instead of the strawberries (even though the Engineer wouldn’t like it as much then – maybe more finely chopped strawberries would work?), and next time, I’d map out the placement of the red stripes to actually match those of the flag. But it was a good first attempt, and everybody loved it! The kids were thrilled, even the Fox, who actually ate the fruit and often left the cake on the plate. The kids even kept asking for it for the two weeks following the holiday, even though it was long gone. Maybe I’d make an all-raspberry version for Canada Day, too!


For the cake

1 (15.25-oz.) boxed white cake mix

1 cup boiling water

1 (3-oz.) box strawberry-flavored Jell-O

½ cup cold water


For the frosting

1 (8-oz.) tub non-dairy sweetened whipped topping (Cool-Whip type), thawed

1 (8-oz.) package lactose-free cream cheese, at room temperature

1 cup powdered sugar, sifted

1 tsp. vanilla


For the topping (see note above)

1 lb. strawberries, thinly sliced (I prefer chopped)

1 cup blueberries


Make the cake as directed on the back of the box for a 9”x13” pan.

Let the cake cool for 20 minutes, then poke it all over with a large fork or a skewer.

Mix together the boiling water and Jell-O until the powder is completely dissolved. Pour in the cold water and mix well, then pour evenly over the cake. Cover and refrigerate for 3 hours.

Combine the whipped topping, cream cheese, powdered sugar, and vanilla and beat until smooth. Spread on top of the cake.

Top with the strawberries and blueberries to match the flag pattern. Keep refrigerated until ready to serve.


[Update, July 2021: This time, I used Cool Whip Sugar-Free Whipped Topping which, while not dairy-free, is at least lactose-free and relatively low in carbs. I’ve also changed my flag a bit with neater stripes, and mini-marshmallows for the stars!]


Monday, August 10, 2020

Chocolate Cinnamon Rolls

 I wasn’t sure I would turn these chocolate cinnamon rolls into a post, but it turns out I successfully learned how to substitute for active dry yeast, so that’s worth remembering! You see, as I was proofing the yeast, which happened to be the last portion in the jar, it really wasn’t bubbling very much at all, and when I checked the expiration date, I realized that it was way dead. So I looked around online to see if there was any way to substitute and found this article, which led me to the difference between active dry yeast and instant yeast. In a nutshell, active dry yeast goes in with your liquid ingredients, then the dough needs a lot of time to rise; instant yeast, on the other hand, goes in with your dry ingredients and is much faster. So I added 1 teaspoon of instant yeast in the flour and reduced the rising time, and it worked out perfectly!

Note that I halved the amount of butter in the filling as well as the amount of icing, and I like things my way, but you do you.

For the rolls

1/3 cup granulated sugar

1 cup lactose-free milk, warmed

5 Tbsp. lactose-free butter, melted

1 pkg active dry yeast (2 ¼ tsp.; see note above)

1 large egg

1 tsp. salt

4 cups sifted all-purpose flour


For the filling

½ cup granulated sugar

½ cup light brown sugar

1 ½ Tbsp. ground cinnamon

6 oz. chopped bittersweet chocolate

6 Tbsp. unsalted butter, melted (I used half)


For the icing (I halved the recipe)

2 cups confectioners’ sugar, sifted

1 Tbsp. lactose-free butter, melted

½ tsp. vanilla

3 Tbsp. lactose-free milk


In the bowl of an electric mixer combine warm milk, sugar, and butter. Sprinkle yeast on top and let stand 2 min until yeast softens. With the bread hook attachment stir in the egg, salt and 3 cups of the flour. Mix well, then add remaining flour and mix until dough pulls away from the bowl edges, about 5 min.

With floured hands, form dough into a ball and place in a greased bowl, turning to coat all sides of ball. Cover bowl with plastic wrap and let dough rise in a very warm place until doubled in size, about 3 hours.

Make filling by combining the sugars, cinnamon and chocolate. Butter two 8”x8” pans and set aside (I don’t have two of those, so I used a single 9”x13” pan).

Turn dough onto a lightly floured work surface and roll into a 14”x24” rectangle about 1/8 inch thick. Spread with the melted butter and sprinkle with the cinnamon mixture. Starting with one long end, roll dough tightly to form a long spiral. Pinch the seam together. Cut into 18 slices (I made 12 with a smaller rectangle), about 1¼” thick each, and place 9 in each prepared pan. Cover with plastic wrap and refrigerate overnight. (If you are making the rolls on the same day, there’s no need to refrigerate them; just let them rise a second time before baking.)

In the morning remove rolls from refrigerator and bring to room temperature in a warm place, 1 hour. 

Heat oven to 375 °F and bake until rolls are golden and cooked through, 18 to 20 min.

Meanwhile, make the icing by whisking together the ingredients until smooth. Let rolls cool slightly before spooning on some icing. Serve warm, ideally. 


Sunday, August 09, 2020

Vanilla Lavender Cupcakes


Remember that time when I made vanilla lavender cupcakes? The cupcakes were gluten-free and the frosting was made with coconut cream. They were good, but… perhaps light on the lavender? And then recently, I bought lavender syrup and I’ve had lavender on the brain since then. The syrup is really nice to flavor a soda, but the catch is that I find it hard to dose properly (too little and I’m wishing I could taste it more, but too much and it tastes like soap). And the bottle is really big, so I’m not going to use it all up in drinks (especially since I also bought rose syrup to offset shipping costs, and that one is something I could keep on hand forever – great to flavor a ginger ale, for example – and if I could just find rhubarb syrup I feel like a whole chunk of my life would simply fall into place).

Anyway, so I decided to revisit the idea of vanilla lavender cupcakes, using an old CakeSpy recipe as a base, halving the recipe and adapting it. I steeped dried lavender in the milk for the cupcakes and used the lavender syrup in the frosting. We really liked the result, and the Engineer called these “brilliant.” The quantities below are mine, though I’m writing down to use less milk in the frosting than I did because it would have been better if it had been stiffer. I got 9 cupcakes from this recipe.

For the cupcakes
½ cup lactose-free milk
1 tsp. dried lavender buds
1 ¼ cups all-purpose flour
1 tsp. baking powder
¼ tsp. salt
½ cup (1 stick) lactose-free butter or margarine, softened
1 cup sugar
2 large eggs, at room temperature
½ tsp vanilla bean paste 

For the frosting 
½ cup (1 stick) lactose-free butter or margarine, softened
3 to 4 cups confectioners' sugar, sifted
½ tsp. vanilla bean paste
1 Tbsp. lavender syrup (see link above)
2 Tbsp. milk
dried lavender buds, to decorate

Preheat oven to 350 °F. Line a muffin tin with cupcake wrappers or grease the tins.

In a small saucepan, bring the milk just to a boil. Stir in the dried lavender, then turn off the heat and let the lavender steep in the milk for 15 minutes. Strain the milk, pressing on the lavender to get all the liquid out, and discard the lavender. Set the milk aside.

In a small bowl, combine the flour, baking powder and salt. Set aside.

In the bowl of a stand mixer, on medium speed, cream the butter until smooth. Add the sugar gradually and beat until fluffy, about 3 minutes. Add the egg, then the vanilla, beating well after each addition. 

Add the dry ingredients in 3 parts, alternating with the milk. With each addition, beat until the ingredients are incorporated but do not over beat. Using a rubber spatula, scrape down the batter in the bowl to make sure the ingredients are well blended. Carefully spoon the batter into the cupcake liners, filling them about ¾ full (I use an ice cream scoop). Bake for 20 to 25 minutes, or until a cake tester inserted into the center of the cupcake comes out clean.

Cool the cupcakes in tins for 15 minutes. Remove from the tins and cool completely on a wire rack before frosting.

For the frosting, place the butter in a large mixing bowl. Add 3 cups of the sugar, the vanilla bean paste, and the lavender syrup. Beat on medium speed until smooth and creamy. At this point, taste the frosting – you’ll probably want to add the remaining sugar. Add the milk if the frosting is stiff, but go 1 tablespoon at a time., beating well after each addition, until you get the proper consistency.

Once the cupcakes have cooled, decorate them as you wish with the frosting and dried lavender (if you just spread frosting on the cupcakes, you’ll have leftovers, but if you go crazy with a frosting tip you will use it all up). Store at room temperature.


Friday, August 07, 2020

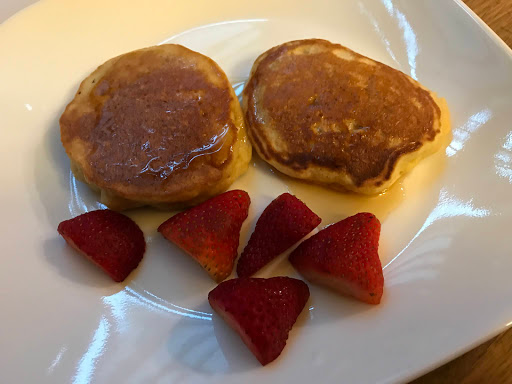
Little Buttermilk Pancakes


I saw a recipe for lacy cornmeal pancakes with strawberry compote in Bon Appétit and decided to try it, but I ended up being disappointed. I think that, for one thing, the compote would have been better with seasonal Quebec strawberries (which I can’t have this year because the pandemic made us decide to stay put in Texas), and for another thing, I’m really more into traditional fluffy pancakes than those thin corn ones.


So when I saw these tall, fluffy buttermilk pancakes on Smitten Kitchen, I went for it, even though they are very similar to my go-to pancake recipe. I doubled the amounts (the ones below are mine) and reordered the ingredients. Using my 3-ounce scoop to ladle out the batter, I ended up with 14 little pancakes, which delighted everyone. Serve with fresh fruit and maple syrup, and/or use as a base to add blueberries or chocolate chips to the batter.

Again, the way to make a lactose-free buttermilk substitute is to put 1 tablespoon of vinegar or lemon juice in a measuring cup and top it up with lactose-free milk until you get to 1 cup. Chemically speaking, it’ll work in the recipe, and while it’s true that it doesn’t taste exactly the same as real buttermilk, keep in mind that what you but at the grocery store likely isn’t real buttermilk either. Other options are to replace half the milk with lactose-free yogurt or, according to Cook’s Illustrated, you can add 1 ½ teaspoon of cream of tartar to the dry ingredients for every cup of milk.

2 cups (260 g) all-purpose flour
1 tsp. baking soda
½ tsp. fine sea or table salt
4 Tbsp. lactose-free butter, plus more for pan
4 Tbsp. granulated sugar
2 large eggs
½ tsp. vanilla extract
1 ¼ cups (plus up to 4 Tbsp. more) buttermilk substitute

Preheat oven to 225 °F and place a large baking sheet inside.

Whisk together the flour, baking soda, and salt. Set aside.

Melt butter halfway in the bottom of a large bowl, then whisk in sugar. This should leave the mixture lukewarm, not piping hot, but if it still is, let it cool slightly before adding the eggs. Whisk in eggs and vanilla, then 1 ¼ cups of the buttermilk. 

Whisk dry ingredients until they just disappear. (You’re looking for a thick mixture, more like a very soft cookie dough than a pourable batter, but if it’s very stiff, add a bit more of the remaining buttermilk and stir until combined.)

Heat griddle or frying pan over medium. Once hot, add a good pat of butter (please don’t skimp; butter makes crispy edges) and dollop in small mounds of pancake batter — I used a 3-ounce cookie scoop, but Deb Perelman uses a much smaller 1.5-tablespoon scoop. Try to resist the urge to press the mounds into flat puddles; a little nudge is okay, but we’d much rather keep the height here. Once bubbles form on top, lift a corner of each pancake and check for it to be lightly browned before flipping it.

At this point, Deb Perelman likes to reduce the heat to medium-low for the remainder of the cooking time, to make sure that they stay golden instead of getting too dark, but with my stovetop I found that it wasn’t worth the trouble.

Once pancakes are golden brown on the second side, and do not worry if the tall sides look raw, this is completely expected, just transfer them to heated oven. Repeat with remaining batter. Tall, thick pancakes like this almost always hide pockets of uncooked batter; 5 minutes in the oven will fix this. You can leave them in the oven for much longer, however, if need be.


Thursday, August 06, 2020

Batch of links

- I highly recommend this excellent article called Will Plant-Based Protein Save the World?, written by Sophia Hampton for Bon Appétit. And while I was looking up the link, I read another great article by the same author, The More Boneless, Skinless Chicken Breasts I Sell, the Worse I feel.

- I liked this Grub Street profile of Molly Wizenberg (or of her diet for a week). Her third memoir, The Fixed Stars, finally came out this week – I preordered last fall and can’t wait to read it!

- The best therapist advice, from 50 different people.

- This woman had her wedding guests recipes on the back of the RSVP cards, and if the Engineer and I renew our vows, I’m totally stealing that idea!

- We have a few summer birthdays in our house, so I was interested in these cake kits you can order online. Not as elaborate as Imaginacake’s kits, but priced accordingly and accessible nationwide.

- The Engineer and I recently became American citizens (mostly so we can vote, also because it makes our lives much easier). I enjoyed this article written by a reporter born in Canada who made the same choice.

- The Chicago Public Library has been putting videos online of guests reading children’s books. My favorite was probably The Word Collector, read by Barack and Michelle Obama, though you should also check out The Boy, the Mole, the Fox and the Horse, read by Oprah Winfrey. (I actually bought that book for the Little Prince, and upon receiving it realized that it was a) much more complex than I had thought, perhaps in some ways like The Little Prince itself, and b) written in a handwriting font that he couldn’t decipher at this point; he wasn’t into the video, so I’m saving this volume for later.)

- Speaking of which, here’s a BLM-themed collection of children’s book available online. I started looking for more read-aloud videos when our local library closed, and I figured it might even save us money in that we could “read” a book without having to buy it. But sometimes the opposite happens – I’d put Edmund Unravels on the Little Prince’s wish list years ago and, when I saw that the book seemed to be going out of print, I decided to just show him the video and delete the item from his wish list and be done with it. So we watched the video and… we both liked it so much that I had to hunt it down and buy it; he’s read it himself several times since.

Saturday, August 01, 2020

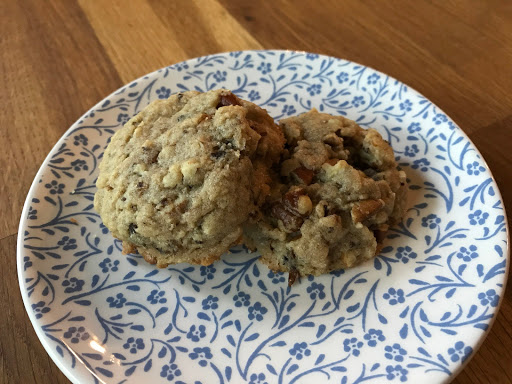
Shroom Cookies


How about a cookie with subtle umami flavor in addition to the sweetness? People would never guess what’s in these cookies: mushrooms! Not just any mushrooms, though, but dried candy cap mushrooms, which smell a bit like maple syrup extract and, therefore, pair well with maple syrup and pecans.

I ordered my candy caps here and used the whole ½-ounce package for the recipe. I got a total of 22 cookies using my 3-ounce cookie scoop. They were almost halfway between chewy cookie and shortbread. Everyone here liked these!

1 cup candy cap mushrooms (see note above)
1 cup (2 sticks) lactose-free butter or margarine, plus more for the pan
1 cup sugar
1 egg
½ tsp. vanilla extract
1 Tbsp. maple syrup
2 ½ cups flour
1 pinch of salt
2 cups pecans, toasted and finely chopped

Place the mushrooms in ½ cup of lukewarm water to rehydrate.  After about 15 minutes, remove the mushrooms from the water and chop finely (the food processor was great for this, and I used it to chop the pecans as well).

Preheat oven to 350 °F.  Line a baking sheet with parchment paper or a silpat.

Sauté the mushrooms in a nonstick skillet with ample butter (start with a few tablespoons).  Sauté until soft and no longer bitter. You may need to vary how much butter you use depending on your batch of mushrooms. Set aside.

In a large bowl, cream butter with sugar until light and fluffy.  Add the egg and beat until incorporated.  Follow with the vanilla and maple syrup.  Stream in the flour, salt, pecans, and reserved candy caps.  Mix until combined. 

Portion out the dough onto the baking sheet (I used my 3-ounce cookie scoop). Flatten gently and bake 11-13 minutes, until the cookies are solid but still appear slightly underbaked – they’ll cook a bit further once removed from the oven, but mine were fine once they were cool after 11 minutes in the oven.