Tuesday, March 29, 2016

Almond and Quinoa Hot Cakes


I made this recipe a while back because I had some black quinoa in my pantry (you can use any color, obviously, but black or red stands out more here). Perhaps I should call them pancakes, but they are a bit different. I have to admit that at first, these really frustrated me. The batter was almost as stiff as dough and they were a nightmare to spread in the pan (despite the instructions that said to use a spatula to spread the batter). I had to add more oil to the pan after each batch and I lowered the heat twice. I got a total of 10 hot cakes, and the last 2 were finally nice. And they were really good! So I’m sure if I had gotten the hang of it sooner, I would have liked them even more. I’d throw in a handful of mini chocolate chips next time.

2 ½ Tbsp. melted extra virgin coconut oil, divided
pinch of cinnamon
½ cup quinoa, rinsed
pinch of salt
1 cup water
1 cup milk of your choice (I used lactose-free milk, but vegan would work too)
2 tsp. lemon juice
½ cup whole spelt flour (or gluten-free all-purpose)
2 tsp. baking powder
½ tsp. baking soda
2 Tbsp. coconut palm sugar (or demerara, evaporated cane, etc.)
½ tsp. fine sea salt
1 ½ cups almond meal
2 tsp. vanilla extract
Handful of mini chocolate chips (optional, I just think I’d try it next time)

For serving (optional)
yogurt of your choosing (coconut, lactose-free dairy, etc.)
2 bananas, sliced + divided
cacao nibs
maple syrup

in a small saucepan over medium heat, drop a ½ Tbsp. of the coconut oil. Once it’s fragrant, add the pinch of cinnamon. Stir that around until it smells way good. Add the rinsed and drained quinoa and a pinch of salt. Stir it around in the oil a bit to toast. Add the water to the pan. Bring the quinoa to a boil, then simmer for about 15 minutes. Drain off excess liquid and cool quinoa completely. (I did this the night before and put the quinoa in the fridge overnight.)

Add the lemon juice to the milk and set aside for 5 minutes to curdle.

In a medium bowl, combine the spelt flour, baking powder, baking soda, coconut sugar and sea salt. Whisk to combine.

In a blender, combine the almond meal, vanilla extract, remaining coconut oil and curdled milk. Flip it to high and blend until the mixture is very smooth, about a minute. Scrape this mixture into the bowl with the spelt flour mixture. Gently fold it all together with a spatula until just combined. Add the cooled quinoa (and mini chocolate chips, if using) and fold it in until it’s evenly mixed.

Heat a large sauté pan or griddle over medium (I ended up lowering the heat later on). Brush with melted coconut oil (or vegetable oil such as safflower or grapeseed oil). Drop 1/4-1/3 cup of batter onto the pan. Spread the batter out a bit with a spatula or the bottom of the measuring cup (this was really hard to do and had me frustrated – maybe I’ll just make smaller pancakes next time). Once bubbles start to form on top and the bottom is golden, flip them over. Continue to cook until bottom side is golden/dry. Repeat with remaining batter, keeping cooked hot cakes warm as you go along and adding oil to the pan as needed.

Serve hot cakes with extra sliced bananas, cacao nibs, maple syrup and yogurt dolloped on top.

Monday, March 28, 2016

Spinach Cake Mini-Muffins

I wanted to make “fun” muffins. I always use white whole wheat flour, and I didn’t want to change that, but I feel like I always put fruit or something healthy in there, and I wanted something less…. virtuous. Maybe chocolate chips. So I made these chocolate chip muffins, but sadly, I didn’t like them. The batter was as stiff as cookie dough, they browned too quickly and came out too dry, the paper liners tore upon removal, and worst of all, they were actually too sweet to be enjoyable (coming from me, that’s really something).

So then I ended up making spinach muffins. I know this seems like troll logic, but as the title says, they’re “cake muffins” and are really delicious. Plus, they sport a nice shade of green. We all loved them! I had to stash some in the freezer before they all disappeared. This recipe is from The Bump, which ran a list of the top 10 recipes for 1-year-olds, curated by Catherine McCord (she of Weelicious). I’ve reordered the ingredients, but haven’t changed the recipe beyond that. The yield is 24 mini-muffins.

1½ cups all-purpose flour
1 tsp. baking powder
½ tsp. baking soda
½ tsp. salt
½ cup unsweetened applesauce
1 large egg
2 tsp. vanilla extract
1 cup (packed) fresh spinach
1/3 cup sugar
2 Tbsp. vegetable oil

Preheat oven to 350 °F. Grease a mini-muffin tin.

In a medium bowl, whisk together the flour, baking powder, baking soda and salt. Set aside.

Place the applesauce, egg, vanilla, spinach, sugar, and oil in a food processor and purée. Pour the mixture into a large mixing bowl.

Slowly mix the dry ingredients into the wet until combined. Scoop batter into the prepared tin, filling each cup 2/3 of the way. Bake for 12 minutes.

Friday, March 25, 2016

Batch of links

- Have you heard of Banza? It’s pasta made from chickpeas, and it has more protein, more fiber and fewer carbs than wheat pasta. I’m curious about it; I’ll keep an eye out for it in the stores (apparently it is sold near me in many locations, but I’ve never seen it).

- Interesting article by Alice Park in Time magazine: the standard American diet may be worse than previously thought. A study has concluded that nearly 60% of calories come from “so-called ultra-processed foods like soft drinks, snacks, cakes, pizza and frozen meals”, which account for (among other things like salt and fat) 90% of the sugar intake. Meanwhile, only 0.7% of calories come from vegetables (and the same amount comes from… pickles). Also noteworthy: salt makes you overeat, protein fills you up, and caffeine spikes blood pressure.

- Also from Time magazine: Why the rise in food-poisoning reports is actually a good thing. The article argues that the speed with which outbreaks are identified has increased, “thanks to the government’s pathogen-tracking system, called Pulse-Net. Now the system can take advantage of whole-genome sequencing, [which] allows experts to identify outbreaks quicker [sic] because they can connect individual food-poisoning cases that stem from the same source. The implications are significant not just for consumers eager to avoid the stomach bug but also for food manufacturers, who face unprecedented scrutiny and possibly severe legal repercussions in food-borne-illness cases.” Since outbreaks are detected and tracked to their source more quickly, fewer people get sick – and someone can be held liable for allowing the outbreak in the first place (the CEO of a peanut-processing company was recently sentenced to 28 years in prison for his role in a salmonella outbreak, for example).

- Vancouver will be getting Canada’s first zero-waste grocery store.

- Recipes for food from Miyazaki movies. You’re welcome.

- There’s going to be an Eataly theme park. I’m having trouble picturing what a food theme park would look like, honestly.

- Why do sandwiches come with pickles?

- Have you heard about Whisper Blend Sound Enclosures? They are just that, a small enclosure meant to muffle the sound of your blender.

- Today is Good Friday, and it’s also New Year’s Day in the original Roman calendar, dates which only rarely coincide. Here’s an interesting article if you want to find out more.

Thursday, March 24, 2016

Green Goddess Quinoa Salad

I made this salad for lunch one day, and I love how adaptable it is. There is an anchovy and garlic dressing, and the addition of minced herbs in the salad basically make this a green goddess salad, albeit in components rather than just with a green goddess dressing. There’s no dairy in this version, and I used hard-boiled eggs as a component of the salad. I also used red quinoa because I had a lot of it on hand, along with baby spinach (though arugula would have been fantastic), edamame, cucumber, and avocado. The quantities below serve one adult and one child for about two meals.

For the salad
2 cups cooked quinoa
1 generous handful arugula or spinach or kale (or your favorite green)
1 avocado, peeled and cubed
1 cucumber, diced
1 handful parsley leaves
chopped chives
chopped herbs of your preference (basil, mint, dill, tarragon, etc.)
1 handful cooked and shelled edamame
hard-boiled eggs
salt and pepper, to taste

Toss all of the ingredients into a bowl and combine. (Obviously, I prefer only adding whatever avocado I’m eating that day to my serving, so it doesn’t brown.) Drizzle with dressing (see below; start with only a little bit, as it is pretty strong).

For the dressing
1 or 2 large cloves garlic, chopped (I’d use less, it’s pretty strong)
½ small shallot, chopped
2 anchovy fillets (I used anchovy paste)
salt and pepper, to taste
1 handful of parsley leaves
juice from ½ lemon (about 2 Tbsp.)
2-4 Tbsp. warm water
1 pinch of sugar
½ cup olive oil

Place all the ingredients in a food processor on medium speed until combined. Keep in a jar with tightly fitting lid in refrigerator for a few days.

Wednesday, March 23, 2016

Vegan Chocolate Cheesecake


When I made the chocolate, peanut butter and banana mousse tart, what I was really looking for was a vegan chocolate cheesecake. I did try making a chocolate version of the raw cashew dreamcake, but it wasn’t really good enough to post. Then I came upon Minimalist Baker’s version, and this one is pretty good! Not quite my ideal vegan chocolate cheesecake yet, but getting closer. I found the crust too crumbly (maybe I should soak my dates longer next time), and the filling was a bit bland, so next time I’d use 8 ounces of chocolate instead of 7 (and that’s what I’m writing below). For the cashews: I always soak them overnight, but if you forget, you could pour boiling water over them and soak them for 1 hour instead.

For the crust
1 cup packed dates, pitted (if dry, soak in warm water for 10 minutes, then drain)
1 ½ cups raw walnuts (or almonds or rolled oats)
3 Tbsp. unsweetened cocoa or cacao powder
1 pinch sea salt

For the filling
1 ½ cups raw cashews (soaked in water overnight, then drained)
1 large lemon, juiced (scant ¼ cup)
¼ cup melted coconut oil (or any neutral-flavored oil)
1 14-oz. can full fat coconut milk
8 oz. dairy free dark chocolate, chopped and melted
¼ cup maple syrup or agave nectar (or honey, if not vegan)

For the toppings (optional)
vegan whipped cream
berries
chocolate syrup
cacao nibs

Add dates to a food processor and blend until only small bits remain and it forms into a ball. Remove and set aside.

Next add nuts, salt and cocoa powder and process into a meal. Then add dates back in and blend until a loose dough forms - it should stick together when you squeeze a bit between your fingers. If it's too dry, add a few more dates through the spout while processing. If too wet, add more almond or walnut meal. (Mine was too dry, and I added several dates, but only soaked the original 1 cup, and I think I never got the right consistency.)

Line the bottom of a springform pan (8- or 9-inch) with parchment paper. (You can also make 12 individual cheesecakes using a muffin tin, in which case each tin must be lined with parchment paper and, ideally, you should place two strips of paper in an X-shape under each round of paper to make unmolding easier.) Put crust in the pan and carefully press with fingers to distribute, allowing some crust to come up the sides. You can pack it down using the bottom of a glass or ramekin. Set in the fridge or freezer to allow to firm up.

Add all filling ingredients to a blender and mix until very smooth - up to 2-3 minutes. (If it won't come together, add a touch more lemon juice, maple syrup/agave or a splash more coconut milk, as the liquid should help it blend better.) Scrape down sides as needed and blend until very creamy and smooth. Taste and adjust flavor/sweetness as needed.

Pour the filling in the prepared pan (or muffin tins). Tap a few times to release any air bubbles, then cover loosely with plastic wrap and refrigerate until set, about 4-6 hours. Expedite this process by popping them into the freezer for 1-2 hours.

Once set, run a butter knife along the edge of the pan and gently open the pan. You can try to slide the cake off the tray, but I tend not to take any chances and I left it on.

Top with a touch of vegan whipped cream and fresh berries, or serve as is! Store in the fridge (or freezer, for longer-term storage).

Tuesday, March 22, 2016

Spaghetti with Quinoa Meatballs

I found a vegetarian meatball recipe that I like better than my tofu meatballs (though, in all honesty, not as much as my actual meatballs). It’s these quinoa meatballs that also contain mushrooms and parmesan, for umami. I had to add a second egg to the mixture to get the meatballs to hold together, so that’s what I’m writing below (even then, they were delicate meatballs). At the recommendation of the original recipe, I used Rao’s marinara sauce, and I have to admit it was really good. I’ll look for that brand next time! I used one and a half containers for this recipe. Also, I ran out of basil, so I used some fresh oregano instead (in a smaller quantity) in the meatballs themselves; since the recipe was missing basil in the sauce ingredients, I didn’t think to buy it and omitted it entirely, but I’ve corrected the ingredient list below.

For the quinoa meatballs
6 Tbsp. quinoa (uncooked)
1 Tbsp. extra-virgin olive oil
½ tsp. crushed red pepper flakes (I used a generous pinch of Korean pepper instead)
1 small onion, finely chopped
2 cloves garlic, finely chopped
1 tsp. fresh thyme, chopped
8 oz. baby bella mushrooms, finely chopped
3 Tbsp. Rao’s Homemade Marinara Sauce (or your favorite brand)
¼ tsp. freshly ground black pepper
salt, to taste
3 Tbsp. parmesan cheese
3 Tbsp. fresh basil, chopped
2 eggs
¼ cup bread crumbs

For the sauce and pasta
12 to 16 oz. spaghetti (I used 16 oz., but found it was too much)
1 tsp. extra-virgin olive oil
½ tsp. crushed red pepper flakes (I omitted them)
32 oz. Rao’s Homemade Marinara Sauce (or your favorite good-quality brand)
½ tsp. freshly ground black pepper
salt, to taste
a handful fresh basil, chopped

For the quinoa meatballs
Start by cooking the quinoa according to package directions (usually 1 part quinoa to 2 parts water, which you bring to a boil, then cover and simmer for 15 minutes). Let cool and set aside.

Meanwhile, heat a large skillet on medium heat; once hot, add the olive oil, then add crushed red pepper flakes and wait until you hear a sizzle.

Add the onion and season with salt and black pepper. Cook until soft, just a few minutes. Add the garlic and thyme and cook for about 30 seconds.

Add the mushrooms and season with salt. Allow the mushrooms to cook for about 10 minutes or until browned. Once the mushrooms have browned, add 3 Tbsp. of marinara sauce. Stir all the ingredients together and turn off the stove; let cool. Save the skillet for later use.

Preheat the oven to 350 °F.

Put the cooled quinoa in a mixing bowl. Add the sautéed mushroom mixture to the quinoa, along with the parmesan, basil, eggs and breadcrumbs. Mix all the ingredients so everything is well incorporated.

Cover a baking sheet with tin foil and coat or spray with oil.

Dampen your hands and use a 1-tablespoon measurement to form little quinoa balls. (The original recipe said I should have about 18, but I got 32, and I don’t think I made them any smaller than required.)

Place them on the tray and bake in the oven for 15-25 minutes (I baked them close to 25 minutes, until they looked a bit browned, and my oven normally runs a bit hot).

For the sauce and pasta
While the quinoa meatballs bake, heat a pot of water for the pasta and cook until al dente according to package directions. Save some pasta water before draining.

Once the meatballs are done, gently scrape them off the baking tray. Put them in the original skillet you were using. Turn on the heat on medium-low, add oil and crushed red pepper flakes, and wait for the pepper to sizzle (again, I omitted the pepper). Add the marinara sauce and season with salt and pepper. Toss the basil on top, cover and simmer on low heat, about 7 minutes.

At this point, you can either add the (drained) spaghetti to the skillet and *gently* toss everything together, adding some reserved pasta water if needed, or keep them separate (which I did, because it makes reheating easier). Serve immediately.

Saturday, March 19, 2016

Bacon and Cheese Waffles

Since I had leftover bacon after making the bacon, leek and ricotta tart, I was looking for something to use it up, and this fit the bill. I mean, I could have just cooked the bacon and served eggs and toast on the side, but why not make a recipe that also calls for basically half a pack, since that’s what I had left? These waffles were fantastic. I love the combination of flavors, and the consistency of the cooked waffles was great; nothing really stuck to the grill, either. The recipe is from Catherine McCord’s Weelicious cookbook, and I’ll be making it again!

2 cups all-purpose flour
2 tsp. baking powder
1 tsp. baking soda
½ tsp. salt
1 cup grated extra-sharp cheddar cheese
½ cup finely chopped cooked bacon
2 large eggs
1 ½ cups lactose-free milk
3 Tbsp. vegetable oil
maple syrup or honey, for serving

Preheat the waffle iron on a medium setting (I like to spray mine with non-stick cooking spray that doesn’t contain alcohol).

In a medium bowl, combine the flour, baking powder, baking soda, and salt and whisk to combine.

Add the cheese and bacon and mix to coat with the flour mixture (this will help prevent clumping).

In a large bowl, whisk the eggs, milk and oil.

Add the dry ingredients to the wet mixture and whisk until just combined, taking care not to overmix.

Pour about ½ cup of the batter into the waffle iron and cook 3-5 minutes, or until the waffles are golden and the cheese is melted. Repeat with the rest of the batter.

Serve with maple syrup (which goes particularly well with these flavors) or honey.

Bacon, Leek, and Ricotta Tart

The Engineer gave me an autographed copy of Ashley Rodriguez’s great book Date Night In. It chronicles a year of meals she made for her husband on their date night – on which they would put the kids to bed early, dress up and have a fancy dinner in their own home, to reconnect without spending too much money. There are stories of the events around each date, and what I really like is that the recipes are presented as menus, so you don’t have to figure out what side dish can be made at the same time as what main dish or what goes well together (assuming you want to make a full menu). I read through it and bookmarked several recipes. The herb-butter roasted chicken with maple coriander roasted carrots was really good, but this bacon and leek tart with ricotta custard was fantastic. The Engineer even called it one of his favorite tarts ever and said that he would eat it endlessly. In the book, it’s served with an apple, grape, blue cheese and endive salad on the side, but I think any green salad would be nice, too.

For the crust
1 cup (140 g.) all-purpose flour
¼ tsp. kosher salt
3 oz. (90 g., or about ¾ cup packed) parmesan, freshly grated

½ cup unsalted butter, cubed and chilled
3 Tbsp. ice-cold water

For the filling
1 cup lactose-free ricotta
1 egg
2 garlic cloves, minced or grated
1 tsp. chopped fresh thyme leaves
½ tsp. freshly ground black pepper
½ tsp. kosher salt, plus more as needed
2 oz. (60 g., or about ½ cup packed) parmesan, freshly grated
1 pinch freshly grated nutmeg
4 strips bacon, roughly chopped
1 large or 2 small leeks, sliced 1/8-inch thick (white and light green parts only)
1 Tbsp. chopped fresh chives (and/or a handful of fresh arugula)

For the crust
Preheat oven to 375 °F.

Combine the flour, salt, and parmesan in a food processor and pulse a few times to combine. Add the butter and then pulse quickly about 20 times, or until the mixture has a sandy texture.

With a few more pulses, blend in the ice-cold water. The dough should stick together when you pinch it between two fingers.

Pour the crumbly dough into a 14”x4” rectangular tart pan or a 9-inch round tart pan with a removable bottom. Press the dough firmly up the sides of the pan, then press the bottom to form a uniform base.

Chill for 15 minutes.

Remove the tart shell from the refrigerator and poke it a few times with a fork. Place on a baking sheet and slide the tart pan onto the oven’s middle rack. Bake for 15 minutes and then use a fork to poke any areas that may be bubbling up. Bake for an additional 10 minutes. Remove from the oven and set aside.

For the filling
While the crust chills, prepare the filling. Stir together the ricotta, egg, garlic, thyme, pepper, salt, parmesan, and nutmeg until well combined.

While the crust bakes, sauté the bacon on medium heat in a medium skillet; stir often, until brown around the edges and just starting to crisp, 5 to 7 minutes. Remove all but 2 tablespoons of bacon fat. Reduce the heat to low. Add the leeks to the pan with the cooked bacon and a pinch of salt. Sauté for 10 minutes, stirring often and separating the leeks, until they are soft and lightly browned in parts.

Pour the ricotta filling into the par-baked tart crust. Top with the bacon and leek mixture. Return to the oven and bake for 20 minutes, or until the custard is slightly puffed and golden around the edges.

Let the tart cool in the pan for 15 minutes before unmolding. Garnish with chives and serve warm at room temperature.

Friday, March 18, 2016

Oatcakes

I don’t think I’d ever made oatcakes before, but I’m in love. An oatcake is a Scottish pastry that I would describe as a cousin to a scone, or perhaps a cross between a scone and a biscuit. The oats are dominant, and the cake itself is a little sweet, but not too much, and it is filling. I loved them for breakfast and as a snack. Since I don’t have round cookie cutters, I used a glass to cut the dough – the diameter of my glass was probably bigger than the cookie cutter called for, because I ended up with fewer oatcakes (14, instead of roughly 2 dozen). I got the recipe from Orangette. These oatcakes are addictive and wholesome and *really* good.


1 ½ cups (150 g.) rolled oats
1 cup (140 g.) all-purpose flour
1/3 cup (60 g.) packed brown sugar
½ tsp. baking soda
½ tsp. fine salt
1 stick (113 g.) cold unsalted butter, diced (I used margarine)
¼ cup full-fat plain yogurt (make sure it’s lactose-free)
lactose-free whole milk, if needed

Preheat the oven to 350 °F. Line two baking sheets with parchment (I only needed one sheet).

In a large bowl, combine the oats, flour, brown sugar, baking soda, and salt, whisking to blend. Add the butter, and use your fingers, pressing and squeezing, to work it into the oat mixture until it resembles a coarse meal (I started with a fork, and only used my fingers at the end). Stir in the yogurt until a soft dough forms. (If your yogurt is on the thick side, you may need to add a tablespoon or so of milk, just enough to bring the dough together.) The dough should be a little crumbly. (In my case, it was very crumbly. Maybe it was a matter of letting the oats absorb the moisture? Even with milk, it didn’t really become a dough until I patted it down in place on my floured countertop, at which point it remained sticky.)

Lightly flour a work surface, and turn the dough out onto it, rolling or patting it to a ¼-inch thickness. (I found that the dough was a little too sticky to roll cleanly, but it worked out alright.) Using a 2-inch round cookie cutter, stamp out oatcakes, and transfer them to the prepared sheet pans. (A bench scraper comes in handy for transferring the oatcakes to the sheet pans and cleaning the counter afterward. I found that I could comfortably fit about 15 oatcakes on one pan and the remainder on the second.) (I am really into parentheses today.) It’s okay to gather and re-roll any scraps of dough.
Bake the oatcakes for about 15 minutes, or until they are golden brown around the edges. Transfer to a wire rack to cool completely, and then store in an airtight container at room temperature.

Thursday, March 17, 2016

Lasagna with Tofu

This lasagna with tofu from The Kitchn had been in my queue for a while. It’s vegetarian, but even with the tofu, it still calls for dairy: parmesan, ricotta and mozzarella. Parmesan (fresh parmesan that you grate yourself) is lactose-free, so that’s not a problem. I know how to make lactose-free ricotta and, as I have to keep reminding myself, it isn’t actually much of a bother to make. For the mozzarella, though, I used Daiya’s shredded mozzarella-style vegan cheese. According to the recipe, the point of the tofu is to help the lasagna slices hold their shape once they’re plated – I have to say that didn’t go as well as planned. My lasagna wasn’t photogenic, and the pieces slumped on the plate (not perhaps not as much as they would have had they been tofu-free). The tofu also gives some protein to the dish.

The problem that I encountered was that following the original directions, which call for 6 lasagna noodles per layer, I ran out of noodles before I was finished assembling the lasagna. Plus, the noodles didn’t bake all the way through, especially where there was overlap. Lasagna noodles are pretty standard in size, and I used a 9”x13” pan for the lasagna: I can fit 3 noodles per layer with no overlap, and I would recommend that you do not go over 5 noodles at the most. Other than that, try to use a good tomato sauce, and/or season your sauce (spices, herbs, garlic, etc.) before adding it to the pan. Also, the amount of roasted peppers was ridiculously small, so I wouldn’t hesitate to double that next time. What I liked about this lasagna, though, in addition to the fact that it’s good-tasting, is that it was easy to make. No boil noodles rock (as long as they cook all the way through, that is).

1 15-oz. package of extra firm tofu
1 cup lactose-free ricotta cheese (see link above)
2 cups shredded mozzarella cheese substitute (such as Daiya)
½ tsp. smoked paprika
1/8 tsp. nutmeg
salt and pepper, to taste
5 cups (usually 1 ½ jars) of tomato sauce
1 lb. no-boil lasagna noodles
1 15-oz. can jarred roasted peppers, or more (or roast 2 red peppers yourself), torn in small pieces
¾ cup shredded parmesan cheese

In a medium-sized bowl, mix the tofu, ricotta and mozzarella cheese with your hands. Squeeze it to get the mixture even and smooth. Add the smoked paprika, nutmeg, and salt and pepper to this cheese/tofu mixture. This may take a few minutes and your hands are the best tool in the kitchen for breaking down the tofu and getting it to evenly incorporate with the cheeses.

Preheat oven to 400 °F. Using a 9” x 13” casserole pan, place about 1 cup of the sauce in the bottom of the pan, smoothing it into a thin layer with the back of a spoon. Layer about 3 to 5 noodles (see note above) onto the bottom of the pan, covering the sauce as best you can. Layer on 1/3 of the jarred peppers. Place 1/3 of the tofu/ricotta mixture onto this bottom pasta/pepper layer and spread it out with your fingers (don't worry if it's not perfectly even; it will melt and become one with the pasta noodles). Lastly, pour about 1 cup of the tomato sauce onto the cheese mixture, spreading the sauce as evenly as possible (but again, don't stress about this too much). Repeat this process three times, ending with a pasta top. To this final pasta layer, add more sauce and sprinkle the Parmesan cheese all over the top.

Cover in foil and bake for about 45 minutes. Remove foil and broil on high for 3-5 minutes more. Let stand for 5 minutes before serving.

Tuesday, March 15, 2016

Macrina Bakery's Apple-Brown Sugar Pie


This recipe is from Macrina Bakery in Seattle, and it was published in Bon Appétit last fall. What sets it apart is that the apples are roasted before being baked in the pie, and that makes a big difference. The pie filling was rich from the sugar and margarine and ended up having a consistency halfway to applesauce – I enjoyed it, but I know some people like chunky apples in their pie, so this recipe isn’t for them. The drawback is that, even though I baked the pie on the lowest rack, the bottom center of the crust was still a bit raw. The top, however, was so done that I took it out of the oven early (so the raw bottom crust might be my fault, but I did it to save the top, because even with my trusty silicone ring, I was afraid it wouldn’t make it). The solution might be to parbake the bottom crust, but I’ve never been fond of that for double-crusted pies. Maybe covering the whole pie with foil would be a better solution… Or you can always use your favorite lactose-free pie crust, including store-bought to save time. In any event, I enjoyed this pie, so it’s worth sharing!

For the dough
1½ tsp. kosher salt
2¾ cups all-purpose flour, plus more
14 Tbsp. (1¾ sticks) chilled unsalted butter, cut into pieces
1/3 cup chilled shortening, cut into pieces
1/3 cup ice water, plus more

For the filling and assembly
4 lbs. Granny Smith apples, peeled, sliced into ½-inch wedges
1 cup plus 2 Tbsp. granulated sugar
¼ cup plus 1 heaping Tbsp. all-purpose flour, plus more
½ cup (1 stick) unsalted butter, cut into pieces, room temperature (I used vegan margarine)
½ cup (packed) light brown sugar
1 tsp. ground cinnamon
1 large egg, beaten to blend

For the dough
Mix salt and 2¾ cups flour in the bowl of a stand mixer fitted with paddle attachment on low speed to combine. Add butter and shortening and beat on medium-low until mixture resembles coarse cornmeal. Drizzle in ⅓ cup ice water, then beat, adding splashes of ice water as needed, until dough just comes together. Turn out onto a lightly floured surface. Gently press together and flatten a couple of times, about 30 seconds. Divide dough in half; pat into disks. Wrap in plastic; chill at least 2 hours.

For the filling and assembly
Preheat oven to 350 °F. Toss apples, 1 cup granulated sugar, and ¼ cup flour in a large bowl. Divide between 2 rimmed baking sheets; bake, rotating baking sheets once, until apples are just tender, 25–30 minutes. (Turn off the oven at this point.) Let cool, then transfer apples and accumulated juices to a large bowl. Add butter, brown sugar, cinnamon, and 1 heaping Tbsp. flour; toss to combine. Chill at least 1 hour.

Let dough sit at room temperature to soften slightly, about 5 minutes. Roll out 1 disk on a lightly floured surface to a 13" round. Transfer to a 9" pie dish. Lift up edges; let dough slump down into dish. Trim, leaving ½" overhang. Roll out remaining disk. Scrape apples into dish and place dough over top; trim, leaving 1" overhang. Fold edge of top crust under bottom crust, press together to seal, and crimp. Cut 8 slits in top to vent, brush with egg, and sprinkle with remaining 2 Tbsp. granulated sugar. Chill pie in freezer until crust is firm, about 30 minutes. 


Preheat oven to 400 °F. Place pie on a parchment-lined rimmed baking sheet; bake 30 minutes on the lowest rack (crust should be slightly golden). Reduce oven temperature to 350 °F and continue baking until juices are bubbling and crust is deep golden brown, 50–60 minutes (this is where I only baked it 30 minutes; cover with foil if necessary). Transfer to a wire rack; let cool at least 4 hours before slicing.

Winter Abundance Bowl

I finally got around to making this winter abundance bowl from My New Roots. I had leftover red cabbage from making rainbow salad, so this was perfect. It was especially convenient to make given that most of the ingredients are cooked in the same pot! I only changed the quantities in the dressing, because the yield was too much, it was too liquid for my taste, and the garlic was definitely too strong. But it really had potential, so I’d make it again using the amounts below. This bowl also goes really well with maple tahini dressing, which the Little Prince preferred.

For the bowl
2/3 cup brown rice
1/3 cup green lentils
¼ to ½ tsp. sea salt
1 small head broccoli
1 medium sweet potato
2 cups shredded red cabbage
juice of ½ lemon or lime
drizzle of cold-pressed olive oil

Combine rice and lentils in a medium bowl, cover with water and wash well, rubbing grains and legumes together. Drain and repeat until water is clear. Cover with water again and soak overnight or for up to 8 hours, if possible. Drain and rinse.

In a medium saucepan place the rice and lentils, plus 1½ cups water (if soaked – add 2 cups water if un-soaked), and sea salt. Bring to a boil, reduce to simmer and cook covered until water has been absorbed and rice and lentils are cooked through (about 30-45 minutes total depending on if you soaked the grain or not, but keep the following steps in mind).

While the rice and lentils are cooking, chop the broccoli into florets and the sweet potato into bite-sized cubes (I aimed for about ½ to ¾ inch cubes). About ten minutes before the grains have cooked (check the water level before adding veggies – if it’s dry, add a little more liquid), add the sweet potato. After five minutes, add the broccoli on top of the sweet potato.

While the rice and lentils are cooking, you can also blend together the sauce (see below) and prepare the cabbage by shredding it with a mandoline or sharp knife. Toss with a squeeze of lemon or lime juice, a drizzle of olive oil and some salt. Toss to combine.

To assemble the bowl, simply spoon in the cooked rice and lentils with the steamed veggies, add the cabbage on the side and pour sauce over.


For the garlic-ginger pumpkin seed sauce
½ cup/75 g. pumpkin seeds
1 small clove garlic (or more, to taste)
small knob of fresh ginger
1 ½ tsp. maple syrup
1 ½ Tbsp. olive oil
1 ½ tsp. apple cider vinegar
1 ½ Tbsp. lemon juice
¼ to ½ cup water (to taste)
heaping ¼ tsp. fine grain sea salt
cracked black pepper
cayenne pepper or Korean pepper (to taste)

In a dry skillet over medium heat, toast pumpkin seeds, stirring every so often, until they begin to pop. Remove from heat and set aside to cool.

In a food processor, pulse to mince garlic and ginger. Add cooled pumpkin seeds and blend on high until sand-textured. Add remaining ingredients (start with ¼ cup water) and blend, scraping down the sides periodically. Add remaining water as needed to suit your desired consistency. Season to taste. Store in an airtight glass container in the refrigerator for up to five days.

Monday, March 14, 2016

Grain-Free Banana Bread

This grain-free banana bread recipe was created by Shauna James Ahern for Food 52. Her was nice and golden, but mine came out very dark – I’m honestly not sure how I could have gotten anything lighter with the buckwheat flour, unless the appearance of the flour varies wildly between brands (always a possibility). In any event, we all really liked this bread, and it held up well in the toaster, which to me is the ultimate test for a gluten-free banana bread (I like it warm and buttered). The original recipe called for chopped hazelnuts, which I omitted.

100 g. finely ground almond flour
60 g. arrowroot powder
50 g. buckwheat flour
1 tsp. baking soda
½ tsp. kosher salt
¼ tsp. ground cinnamon (optional)
½ cup maple syrup
2 large eggs
80 g. melted coconut oil
1 tsp. vanilla
3 ripe bananas, mashed

Preheat the oven to 375 °F. Grease a 1-pound loaf pan.

Whisk together the almond flour, arrowroot powder, and buckwheat flour in a large bowl. Add the baking soda and salt (and cinnamon, if using) and whisk them all together. Set aside.

In another bowl, stir together the maple syrup, eggs, coconut oil, and vanilla. Mash the bananas, add them, and whisk until everything is combined well.

Add the dry ingredients to the wet, stirring as you go, a bit at a time. There isn’t any danger of overmixing here, because there’s no gluten in the recipe!

Pour the banana bread batter into the greased pan. Bake until the banana bread is springy to the touch, the edges are pulling away from the pan, and the top is browned, about 45 to 60 minutes. Cool before slicing.

Monday, March 07, 2016

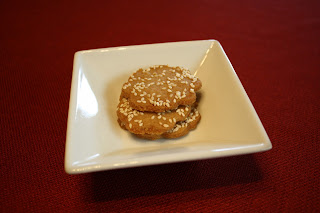
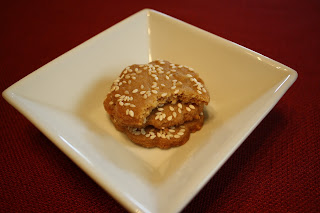
Tahini Cookies


I’ve had sesame cookies on the brain lately. I decided to try a recipe I’d had for a long time, and when I asked the Engineer to buy ½ cup of sesame seeds, he brought back 2 cups and basically said that the price was really good. So I decided to cue up all the sesame cookie recipes I’d been meaning to try. But things didn’t turn out too well.

I used to work in a flower store, and the building owner’s wife would sometimes bring homemade cookies on holidays. My favorite were her sesame cookies. She eventually agreed to share the recipe, which I dutifully wrote down on a series of pink Post-Its. And then put away for 10 years. But then when I dug it up and made it… those were not her cookies. I followed her instructions to the letter, but there was hardly anything in common between what came out of my oven and what she used to make. I’m pretty sure she left out something important just to keep her family recipe safe. All I have to say about that is, she’d better hope she never needs me to give her directions anywhere. (Also, if anyone has a recipe for a Greek or Eastern European cookie, crisp and golden yellow, shaped like little miniature braided challah and, I think, brushed with egg wash before being sprinkled with sesame seeds, please send it my way.)

I followed that up with sesame coins from Alice Medrich’s Pure Dessert. They were actually quite good, but a little thinner than what I wanted. (To be fair, I still wanted the first cookies I had tried to make.)


Then I tried seeded buckwheat cookies, but those also came out looking nothing like the photo. When the Engineer saw the baking sheet, he asked what they were, and I showed him the original picture and said, “Well, I can tell you what they’re not. They’re not these!” So I’m not touching that recipe again. To use up more sesame seeds, I made no-bake sesame, coconut and ginger cookies, both the baked and unbaked versions, but they weren’t my thing and a lot of them ended up in the trash. To use up more sesame seeds, I also tried a sesame chicken celery root salad, which was good except for the fact that it didn’t keep too well in the fridge (I found that the celery root got pasty and unpleasant).

The only sesame cookie that I think is worth discussing here is this tahini cookie from Bon Appétit. In my case, I felt that the dough remained too crumbly and the cookies were a bit too dry for me, even though I only baked them 18 minutes. Next time, I would use tahini that’s a bit more liquid (more “natural almond butter at room temperature” than “natural almond butter in the fridge,” if that helps) or I’d add some moisture. Maybe an egg yolk? In any case, these were good and I’d make them again. I got 16 cookies. (And I didn’t even use the sesame seeds that the Engineer bought for these, because he bought white seeds, but these cookies look better studded with black seeds. I still have ½ cup of white seeds to use up!)

1 cup all-purpose flour
½ cup toasted pine nuts
⅓ cup powdered sugar
⅓ cup tahini
¼ cup unsalted butter (½ stick), room temperature
½ tsp. kosher salt
2 Tbsp. black sesame seeds
2 Tbsp. demerara sugar

Preheat oven to 350 °F. Pulse flour, pine nuts, powdered sugar, tahini, butter, and salt in a food processor until dough forms a ball around blade. (See note above, about moisture level in the dough.)

Mix black sesame seeds and demerara sugar in a small bowl.

Form dough into 1” balls and roll in sesame seed mixture. Place on a parchment-lined or silpat-lined rimmed baking sheet, spacing 2” apart, and flatten slightly. Bake cookies until lightly golden, 20–25 minutes (I only baked mine 18 minutes).

Friday, March 04, 2016

Batch of links

- I found this nice discussion on the food shown in both Star Wars and Star Trek. I definitely noticed the food in the latest Star Wars, including the weird green bread (which, as it turns out, is actually edible). The original Star Wars series also influenced food writers. As for the produce in the latest movie, it actually reminded me of the flowers on Star Trek, in that all were “exotic” produce/flowers here on Earth and the prop masters were perhaps betting on most people not recognizing them (but I’m a food lover and ex-assistant-florist).

- Six gourmet chocolates with amazing designs. Too bad some of them are in the U.K. – shipping would kill me.

- I forgot to post this link last week, about Soylent and other protein drinks. It contains a video in which a sommelier, a gastroenterologist, a personal trainer and a dining reporter do a taste test on Soylent to see if it could replace food for them. This is a previous version of Soylent; the Engineer reports it is now less gritty (and personally, I preferred a version even anterior to that, which was flavored with vanilla).

- When you eat your evening meal, are you having dinner or supper? It should be noted that English is not my first language, but I’ve always used “dinner” to mean the evening meal and “supper” to refer to the fourth meal, like in the Hobbit meal schedule in the movies and Bram Stoker’s Dracula book (“You will I trust, excuse me that I do not join you, but I have dined already, and I do not sup.") I do have Anglophone friends, however, who use “supper” to mean the evening meal, and I had just chalked it up to regional differences. But according to this interesting article, while both terms are often used interchangeably, “supper” is actually a light, informal meal whereas “dinner” tends to be heartier and/or fancier. The more you know.

- Now that I eat in restaurants with the Little Prince every once in a while, I’ve become aware of how many crayons are wasted at each establishment. Because when your child is given crayons and a paper menu to keep busy until the food arrives, unless you take the crayons home with you, they end up being tossed away after your meal. Multiply that by how many children eat there, and that’s a whole lot of waste of barely used crayons! Luckily, a dad came up with a great way to recycle them, melting them into new crayons for children at hospitals. His project is called the Crayon Initiative, and I’ll bring it up at restaurants from now on.

- I’m falling behind on my TV viewing, which is why I really hope Google completes its system to save us from spoilers on social media.

- With the elections coming up, I thought it would be interesting to use Greenhouse, a plugin created by a then-16-year-old (now 18-year-old) that shows where politicians get their funding. You can find out more in this article or directly at the website.

- I don’t know if you’re a fan of Yid-Life Crisis, but even if you’re not, you should check out their latest video, starring Mayim Bialik.

- A really interesting article the downsides of mindfulness. I’d only heard of mild, rare negative side effects before reading this, but it turns out this is way more widespread than people believe.

- Scientists say “resting bitch face” is real. I sometimes think I suffer from that.

- And finally, this video made me unbelievably optimistic: someone has what he believes is an achievable solution for climate change, AND it can help fight world hunger at the same time.

Thursday, March 03, 2016

Buttermilk Oven-Fried Chicken and Rainbow Salad

OK, so I’ve made more recipes from Jenny Rosenstrach’s Dinner: A Love Story cookbook. I ended up not talking about them because they were good, but not great. There was whole wheat spaghetti with caramelized onions, spinach and parmesan; turkey chili (some of which is still in the freezer); and now, this buttermilk oven-fried chicken with rainbow salad.


It’s very similar to the breaded chicken cutlets I’d made before, but this time, the chicken is marinated in buttermilk first. (The original recipe called for drumsticks, but I used skinless boneless chicken breasts that I cut into smaller pieces.) What I really liked was the side, because we’re always reminded that we should eat “all the colors of the rainbow”, and wham! They’re all on the plate at the same time here. The Little Prince liked the chicken, but he only tasted the salad the third time I served it, although even that was a bit of a miracle. (Also, as I was preparing the salad, he asked for, ate and DID NOT SPIT OUT bell pepper for the first time.) I really liked it and will keep this meal in rotation!

For the chicken
4 cups buttermilk (I use ¼ cup lemon juice or vinegar and 3 ¾ cups lactose-free milk)
2 Tbsp. Dijon mustard
4 garlic cloves, halved
6 to 8 drumsticks, skin on (see note above)
1 ½ cups plain Kellogg’s Corn Flake Crumbs, salted and peppered (panko crumbs would also work)
1 tsp. dried oregano
leaves from 1 sprig fresh thyme
½ tsp. cayenne (or a big pinch of Korean pepper, you know me)
salt and black pepper

In a bowl, whisk together the buttermilk, mustard, and garlic. Add to a large zipper-lock plastic bag with the chicken pieces. Refrigerate for at least 30 minutes and up to 12 hours.

Preheat the oven to 400 °F. Line a large shallow baking sheet with foil and coat lightly with cooking spray.

In a large bowl, combine the corn flake crumbs, herbs, cayenne and salt and pepper.

Pull the chicken pieces out of the marinade, letting the excess drip off. Dredge each drumstick in the bread crumbs until well coated and then place on baking sheet. Spray the pieces lightly with cooking oil. Bake until golden and cooked through, 35 to 40 minutes (30 minutes in my case, with the split breasts).

For the rainbow salad
Chop a red bell pepper and an orange bell pepper, slice some red cabbage, add frozen corn and peas (or edamame, in my case). Heat everything in a small saucepan with water or in a frying pan for about 5 minutes; at the end, add a pat of vegan margarine and some salt (optional). Note that after a few days, the cabbage will dye the other vegetables a blueish shade.