Friday, February 27, 2009

Red Kidney Bean Curry


I figured I would throw this recipe in here, as proof that I’m good for other things besides baking. This was a very easy recipe, but very rewarding. I adapted it from Smitten Kitchen. It serves between 4 and 6 people, depending on your appetite (it was 5 servings for us). Also, we used dried beans that I soaked, cooked and rinsed, so that limits gas that could occur with canned beans. This recipe has the perfect amount of spice for me, but then again, I don’t really like spicy foods, so feel free to add a chili pepper, hot sauce or more cayenne pepper.

Red Kidney Bean Curry

1/3 cup of extra-virgin olive oil (it seems like a lot, but it helps mix the spices)
4 tbsp of finely chopped fresh ginger
3 cloves garlic, finely chopped
1 medium onion, finely chopped
8 oz can of tomato sauce
1 tsp of salt
1 tsp of ground cumin
1 tsp of ground coriander
½ tsp of cumin seeds
½ tsp of ground turmeric
1 pinch of savory (optional)
1 pinch of cayenne pepper
1 tomato, diced
3 cups boiled red kidney beans (or a 30 oz can, drained and rinsed)
1 1/3 cup of water
½ cup of chopped fresh cilantro


Heat the oil in a deep sauce pan over medium heat for one minute. Add the ginger, garlic and onion and let sizzle for one minute.


Add the tomato sauce, salt and remaining spices and cook for an additional five minutes, stirring frequently.


Add the kidney beans, water and tomato.


Bring it to a boil, then reduce to medium heat and let cook uncovered for 10 minutes. Remove from heat. Garnish with cilantro.

Serve with a dollop of plain yogurt and naan bread.

You’ll notice in my picture that there are three green blobs in my plate. Since the Metro grocery store nearest us sucks, it didn’t have fresh cilantro and we used some that comes in a tube. It’s still good, and once it was mixed with the food, it looked like chopped fresh cilantro normally would. And this dish was delicious!

Thursday, February 26, 2009

Coconut Cupcakes with Seven-Minute Frosting

Those of you who have kept track of the last three recipes know that I dutifully set aside a total of eight egg whites. And it just so happens that one of the many recipes I’ve been meaning to try calls for exactly eight egg whites. It was meant to be! It’s basically the coconut cupcake recipe from the February 2009 issue of Martha Stewart Living (which has the greatest cupcakes ever!).


Coconut Cupcakes

1 ¾ cups of all-purpose flour
2 tsp of baking powder
½ tsp of salt
½ cup of unsweetened shredded coconut
¾ cup of margarine or butter, softened
1 1/3 cups of sugar
2 large eggs
2 large egg whites
¾ cup of unsweetened coconut milk
1 ½ tsp of pure vanilla extract

Preheat oven to 350 °F. Line 20 muffin tins with paper liners.

Whisk together flour, baking powder, salt and shredded coconut.


Cream margarine and sugar with a mixer until the mixture becomes light and fluffy.


Add eggs, one at a time, beating after each addition. Repeat with egg whites.


Mix coconut milk with vanilla.

Reduce speed to low. Add flour mixture to margarine mixture in 3 additions, alternating with coconut milk and ending with flour. Scrape sides of the bowl.


Divide the batter among muffin cups, filling each about 2/3 full.


Bake cupcakes until testers inserted into centers come out clean, about 20 minutes. Let cool in tins on wire racks.


Seven-Minute Frosting

This is the recipe as it appeared in the magazine; however, I had about twice as much as I needed for the cupcakes (though it would have been enough for a cake).

1 ½ cups + 2 tbsp of sugar
2/3 cups of water
2 tbsp light corn syrup
6 large egg whites

Mix 1 ½ cups of sugar, the water and the corn syrup in a small saucepan over medium heat. Cook, stirring occasionally, until sugar dissolves. Bring to a boil and cook until mixture registers 230 °F on a candy thermometer.


Meanwhile, whisk egg whites with a mixer on high speed until soft peaks form. With mixer running, add remaining 2 tbsp of sugar.


With mixer on medium-low, pour sugar syrup in a slow, steady stream down the side of the bowl. Increase speed to medium-high and whisk until stiff peaks form and mixture is cool, about 7 minutes.


Frost the room-temperature cupcakes. You can garnish them with large flakes of unsweetened coconut. It is best to serve them immediately, as the frosting will harden on contact with air. So it does not go bad or anything, but it will be noticeably drier and harder by the next morning – it’s the marshmallow effect. (Note that this did not happen to some frosting that I had saved in a bowl covered with plastic wrap and stored in the fridge.) That being said, I LOVED this frosting, not only because it tastes great, but because it is lactose-free. And the cupcakes were fantastic, too!


Saturday, February 21, 2009

Quiche aux pommes et au bacon (option sans lactose!)

Cette recette-là, elle a une place toute spéciale dans mon carnet de recettes, parce que c’est la première vraie recette que j’ai faite dans ma première vraie cuisine après avoir quitté le foyer familial.

5 ou 6 tranches de bacon (ou plus, au goût), en petits morceaux
3 pommes évidées, pelées, coupées en petits dés
1 ½ tasse de fromage râpé
3 gros œufs
1 gros jaune d’œuf
1 tasse de lait entier
une pincée de muscade
une pincée de paprika
sel et poivre
une ou deux abaisses de pâte à tarte


Tout d’abord, pour les abaisses de pâte : si vous avez un plat comme le mien dans les photos, genre 10 pouces de diamètre et 2 pouces de profondeur, une seule abaisse suffit. (Vous pouvez utiliser ma recette de pâte brisée.) Si vous achetez des abaisses préparées, style Tenderflake dans des assiettes de 9 pouces, il vous en faut deux, et vous devrez peut-être augmenter un peu la quantité d’œufs et de lait. Vous pouvez alors mettre une quiche au congélateur, c’est pratique les soirs où vous n’avez pas l’énergie de faire à manger.

Ensuite, pour le fromage : j’ai pris environ la moitié d’un paquet de cheddar Live Active, qui ne contient pas de lactose (sans doute grâce aux probiotiques, parce que c’est la même chose pour les yogourts Activia par exemple), et un paquet de fromage suisse sans lactose. En fait, plus un fromage est âgé, moins il a de lactose. Mais pour savoir s’il nous convient, rien d’autre que la méthode essai et erreur. C’est pourquoi j’apprécie beaucoup les petits paquets de suisse tranché où il est écrit spécifiquement « sans lactose ». Et avec du lait sans lactose, le tour est joué.


Préchauffer le four à 375 °F.

Faire chauffer le bacon dans une poêle à feu vif pendant 3 minutes. Ajouter les pommes et poursuivre la cuisson 5 minutes.


Laisser refroidir le mélange, puis le verser dans l’abaisse. Couvrir de fromage et assaisonner de muscade, de paprika, de sel et de poivre.

Mélanger les œufs et le jaune d’œuf avec le lait. Verser sur le fromage.


Faire cuire au four environ 40 à 45 minutes (si vous avez deux abaisses, c’est plutôt 30 minutes).

Friday, February 20, 2009

Yellow Cake with Bittersweet Chocolate Frosting


Here’s a recipe that I originally got from Chowhound and changed a bit. I made it the night after the crème caramel, since that dessert had not lived up to my expectations and the Engineer hadn’t been too fond of it either. I forgot to take pictures during the process, but it’s really nothing complicated.


Yellow Cake

2 ½ cups of all-purpose flour
1 ½ tsp of baking powder
1 tsp of salt
¼ tsp of baking soda
¾ cups of unsalted butter (1 ½ sticks) or margarine, at room temperature
1 ¾ cups of granulated sugar
2 tsp of vanilla extract
3 large egg yolks
3 large eggs
1 cup of whole milk
Bittersweet Chocolate Frosting

Heat the oven to 350°F with the rack in the middle position. Grease two 8-inch cake pans and put a piece of wax paper in the bottom. Grease again, then flour. Set aside.

Combine flour, baking powder, salt and baking soda in a small bowl and whisk together. Set aside.

Place butter in the bowl of a stand mixer (a hand-held one will do just fine, too) fitted with a paddle attachment and mix on medium-high speed until fluffy and light in color, about 3 minutes. Add sugar and vanilla, and continue beating another 5 minutes. Don’t forget to stop the mixer and scrape down the sides of the bowl and the paddle as necessary. Add yolks one at a time, letting each incorporate fully before adding the next. (Once again, I kept the whites and set them aside, along with the ones from the crème caramel, for an upcoming recipe.) Add the whole eggs in the same manner, allowing 1 minute between additions.

Add 1/3 of the flour mixture and turn the mixer to low speed, mixing until the flour is just incorporated. Add ½ of the milk, and mix until just incorporated. Continue with remaining flour mixture and milk, alternating between each, until all ingredients are incorporated and smooth.

Divide batter evenly between the prepared pans. Bake until edges slightly pull away from the pans and a cake tester inserted in the center comes out clean, about 30 to 40 minutes.

Remove the pans from the oven and let cool on a wire rack about 10 to 15 minutes. Run a knife along the perimeter of each cake, then turn out onto the rack to cool completely (at least 1 ½ hours) before frosting.


Bittersweet Chocolate Frosting

This was originally a classic buttercream frosting. However, I used a margarine that’s 100% soy, so the icing is actually lactose-free*, but it still tastes great. And the chocolate keeps the icing from being too sweet.

1 ½ cups of margarine (or butter)
2 2/3 cups of powdered sugar, sifted
1 tsp of vanilla extract
6 oz of bittersweet chocolate, melted and slightly cooled.

Beat margarine in the bowl of a stand mixer fitted with a paddle attachment, on medium-high speed until light and fluffy, about 3 minutes.

Stop the mixer and add the powdered sugar. Turn the mixer on to low, then gradually increase the speed until the powdered sugar is completely incorporated.

Turn the mixer off and add the vanilla and the chocolate. Beat on medium-high speed until the frosting is airy and thoroughly mixed, about 3 minutes.

Place a cake layer on a cake plate, bottom-side down. Evenly spread about 1/3 of the frosting on top of the layer. Stack the second layer on top and evenly spread another 1/3 of the frosting on the top and sides of the whole cake. (Don’t worry about looks at this point – this is just a crumb layer.) Place in the refrigerator until frosting is set and slightly hard, about 15 minutes. Remove from the refrigerator and spread remaining frosting over the top and sides of the cake, ensuring it’s as even as possible. Ta-da!

I must admit I found this cake a bit dry, so maybe it should be made with oil or apple sauce or something along those lines. I’ll let you know if I ever figure out the proportions, but any suggestions are welcome.


*At least, that’s what I thought, since the package said in several places “100 % soy”. But then the next day, I got a little sick. So I bothered looking closely at the package: it actually has a list of ingredients, not all of which are soy. This contains whey! So it is NOT 100% soy, it DOES have dairy, and this false advertising has infuriated me enough to make the following statement: Bergeron margarine makers should be ashamed of themselves.

Crème caramel


Voici le premier d’une série de trois ou quatre billets de cuisine.

J’ai récemment repensé à un dessert que ma mère faisait souvent quand j’étais petite : il s’agit de la crème caramel. Elle m’a dit qu’il n’y avait pas de crème dans sa recette, alors j’ai décidé d’en faire. Ce n’est pas que je n’aime pas la crème, mais je n’ai pas encore trouvé de crème sans lactose sur le marché. Du lait sans lactose, par contre, il y en a. J’ai donc décidé de faire la recette, même si elle m’intimidait un peu au début parce que je n’avais jamais fait de caramel.

Pour finir, le dessert n’était pas aussi bon que celui de ma mère. J’ai décidé d’en parler quand même pour deux raisons. Premièrement, je pense avoir trouvé pourquoi ça n’a pas bien fonctionné, alors en théorie, je devrais pouvoir vous éviter le même sort. Et deuxièmement, c’est comme ça la vie, on ne réussit pas tout ce qu’on cuisine. Et il ne fait pas en faire tout un plat (désolée, je n’ai pas pu me retenir).

Voici la recette :

½ tasse de sucre blanc (ou un peu plus)
4 jaunes d’œufs
1/3 tasse de sucre blanc
¼ c. à thé de sel
2 tasses de lait (entier!)
½ c. à thé de vanille
un soupçon de muscade (facultatif)

Faire fondre ½ tasse de sucre blanc dans une grande poêle épaisse, à feu très bas et en brassant avec une cuillère de bois. Chauffer jusqu’à ce que le sucre soit complètement fondu et d’un beau brun. Moi, j’ai commencé avec mon brûleur à « LO », et quand ça n’a rien donné, j’ai augmenté ça à « 2 » (sur 8). À partir de ce moment-là, ça m’a pris environ 20 minutes. Sûrement qu’avec de l’expérience, j’aurais pu faire ça plus vite, mais bon… Surtout, faites attention : le sucre fondu est quelque chose d’extrêmement chaud.


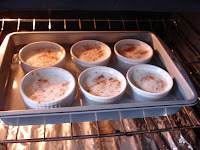
Répartir le sucre fondu dans 6 petits ramequins (de 5 onces) et les remuer pour bien enduire toutes les parois de sucre. Je vous rassure tout de suite : je n’ai pas pu enduire toutes les parois en une seule fois. Vous verrez sur la photo suivante que mes derniers ramequins (à gauche) étaient plus réussis que mes premiers (à droite). J’ai ensuite rajouté un peu de sucre fondu dans ceux de droite, comme on voit sur la deuxième photo ci-dessous. Ce n’est pas grave si le fond n’est pas beau, ça ne paraîtra plus après la cuisson. Et pour laver les ramequins, inutile de vous battre avec. Faites-les plutôt tremper quelques heures, ça se nettoie presque tout seul après.


Chauffer le four à 350 °F. Faire bouillir de l’eau.

Battre ensemble les jaunes d’œufs, 1/3 tasse de sucre blanc et le sel. (J’ai gardé les blancs d’œufs en pensant que ça pourrait toujours servir pour autre chose; j’ai en effet trouvé, et la recette s’en vient bientôt.) Chauffer le lait dans une casserole à fond épais jusqu’à ébullition et l’ajouter aux jaunes d’œufs, petit à petit, en brassant. Ajouter la vanille.

Verser dans les ramequins et disposer ces derniers dans un grand plat contenant 1 pouce d’eau bouillante. Saupoudrer de muscade.


Cuire au four, de 45 à 50 minutes ou jusqu’à ce que la lame d’un couteau de métal insérée dans la crème au centre du ramequin en ressorte sèche. Retirer de la plaque d’eau chaude immédiatement. Servir tiède ou refroidie. Pour démouler, glisser un couteau sur tout le pourtour du ramequin et inverser rapidement sur une assiette. Le caramel coulera tout autour de la crème démoulée.


Et mon erreur : j’ai pris du lait 1 % au lieu du lait entier (ce n’était pas précisé dans la recette, bon!). Résultat : la crème a mis près de deux heures à cuire, et quand je l’ai démoulée, elle s’est effondrée. Mais elle était bonne quand même (deux des crèmes ont été démoulées, les quatre autres ont été mangées dans les ramequins). Voilà, pour une telle recette, c’est donc important de prendre du lait entier (alors que dans un gâteau, on voit rarement la différence). Aussi, avoir à refaire ça, je laisserais fondre mon sucre un peu moins longtemps, car le goût de brûlé était un peu trop prononcé.

Thursday, February 19, 2009

Buns

I was already feeling like I hadn't updated in a while. Does this mean I'm hooked to blogging? ;)

Here's a quick restaurant review: Buns, at 1855 Ste Catherine West. Yes, I am still looking for the best burger in Montreal. I must admit that I hold them up to a pretty high standard (The Works, in Ottawa, has by far the best hamburgers I’ve EVER had). The closest I’ve come so far is m:brgr, but the prices keep me from fully enjoying the food there. I’ll post a review on my website soon.

Anyway, Buns is a minimalist joint if ever there was one. There are a few chairs and tables for two, for those who insist on eating their meal on the spot. And there are only four items in the menu: hamburger, double hamburger, roasted potatoes (not fries) and soft drinks (from a fridge). All burgers come with tomato, pickle, lettuce, ketchup and mustard; you can add a slice of mozzarella cheese at no extra cost.

Taste-wise, I would say that they are good, but not extraordinarily so. The patties are probably frozen and are only cooked well-done. I personally found the burgers better than those at Mr. Steer’s, but the Engineer vehemently disagrees. I think it’s the dressing on the burgers and the bread that make them worthwhile. Also, the seasoned roasted potatoes are very good, and a nice change from the fries (which I never thought I would say).

So I basically think that those burgers are okay, and the prices are more than reasonable ($4 for a burger, including taxes). It’s a nice hole-in-the-wall, but not the best burgers I’m looking for.

Monday, February 16, 2009

Truffle of the moment

Anyone who knows me knows I LOVE chocolate, especially dark chocolate, and truffles above all.

I thought I'd share my latest find with you, since it really seems like my perfect truffle right now. It's the Laura Secord Signature Truffled Dark Chocolates.


The only downside is that the box has a false bottom, so you are actually getting fewer truffles than it seems at first. But they are so good! Their shape and size are perfect and they melt slowly in your mouth. They are delightfully rich, not too sweet, but with only a hint of bitterness. A very satisfying treat!

And even the Engineer loves them, even though he normally prefers white chocolate.

Waffles for breakfast


Last weekend, the Engineer and I made waffles for breakfast. We have a waffle iron that we love using, and somehow it got stored on top of our cabinets and we forgot about it for a while. But I stumbled upon a waffle recipe online (it was called "Best Waffle Recipe Ever") and I decided to try it. I found it on Fusion4Design through The Girl Who Ate Everything, and changed one little thing.

1 3/4 cups of all-purpose flour
1 tbsp of baking powder
1/4 tsp of salt
2 eggs, separated
1 3/4 cups of milk
1/2 cup of canola oil


In a medium mixing bowl, stir together flour, baking powder and salt. Make a well in the center. In another bowl, beat egg yolks slightly. Stir in milk and oil. Add the egg yolk mixture all at once to the dry mixture. Stir until just moistened (the mixture should still be lumpy).

In a small bowl, beat the egg whites until stiff peaks form. Gently fold egg whites into the flour and egg yolk mixture, leaving a few fluffs of egg white - do not overmix.


Then proceed to make waffles, using about 1/2 cup to 2/3 cup of the mixture per waffle.


The great thing about this recipe is that the egg whites help make this waffle fluffy on the inside, while still being delightfully crisp on the outside.

Here's my tip for greasing the waffle iron: use a spray. But not any spray! I generally disapprove of them after I once used Pam and realized that it smelled overwhelmingly like rubbing alcohol. That is not an ingredient I want in my food. So I normally grease everything the old-fashioned way. However, with a waffle iron, this is not efficient, and you'll always miss some spots, causing your waffles to stick to the iron - and then making waffles becomes a chore. So use the spray, but try a brand like Mazola, which doesn't have all that crappy stuff in the oil.

Saturday, February 14, 2009

O Noir

For our first Valentine’s Day as a married couple, the Engineer* decided to surprise me with midday plans. All I knew was that it involved lunch. I must admit I enjoyed the anticipation! We got on the bus and walked down Sainte-Catherine until he stopped in front of O Noir, where I had been dying to go for quite some time. “Really?” I asked, hopeful and excited. And yes, we really did have lunch at O Noir.


For those of you who are not familiar with the concept: you arrive at a set time, order from the menu and leave your jackets, big purses and any luminous items (cell phone, iPod, etc.) in a locker. You are then guided by your waitress or waiter into a pitch-black room to your table, where you proceed to eat your meal in complete darkness. And the waiters/waitresses are blind, which actually makes it much easier for them to navigate through the room and help you situate yourself once at the table. (Also, the restaurant gives 5% of its profits to charities helping the seeing-impaired.) Kim was our waitress today, and she did a wonderful job of making us feel at ease.

I had the avocado salad as an appetizer, then filet mignon and a raspberry-chocolate mousse for dessert. We started with bread and butter. I know this will sound clichéd, but not being able to see really makes you focus on your other senses: the noise made by the bread’s crispy crust, the bread’s warmth, the taste of it along with the butter... Heavenly. It’s just a little hard to butter it “properly”, but not impossible.

Then the avocado salad made things a little harder: it’s hard to figure out where pieces of food are on a plate when you can’t see them, and you can’t figure out how big they are and what shape they have until they reach your mouth! It turns out that the avocado is cut into slivers lengthwise (which I realized after getting pieces to touch my chin or my nose before my mouth). There is also some lettuce on the plate, along with a few tiny cubes of bell pepper and great dressing. I must admit that at the end, I used my fingers to feel around the plate and get all the lettuce (it’s really hard to poke a fork through it!). Of course, no one could see me, so it wasn’t too embarrassing. It was a really good salad, though, and the avocado was perfectly ripe. As far as I know, I ate all that was on the plate.

Then the filet mignon arrived, and all I knew was that it came with peppercorn sauce, potatoes and asparagus. Luckily, it was precut into pieces, so I didn’t need a steak knife or anything – not that I would have been very successful at using one! The only problem with the dish was that the steak pieces were much too big for me, so I had to tear them apart in two or three smaller pieces before I could eat them. I’m sure it would not have been a pretty sight! After poking around the plate, I figured out that the vegetables were at 8 o’clock: the first I tasted was a green bean, then asparagus. The meat was at 12 o’clock, and something that could have been the potato was at 4 o’clock. I poked around with my fork, but couldn’t get anything to stick onto it, so I used my fingers to feel the potato: it was baked and cut into slices, which I was then able to push onto my fork. I eventually felt a spherical piece of food with the vegetables; it turned out to be a piece of carrot. Once I was situated, it was much easier to pick what I wanted to eat! I ended up leaving a little food on my plate, though I’m not sure how much. I just felt that I had reached my limit (and I had to save a little room for dessert).

The chocolate mousse arrived. (I took some Lactaid out of my purse; luckily, I can do that blindfolded by now, so it was not an issue. For those of you who did not know, I am lactose-intolerant, and this will come up at various points as I share recipes with you!) I located it around the middle of the plate and eventually realized that some pieces were more raspberry-with-gelatine, while others were more chocolate-with-cream, and there was a thin cake base. It was very good, and I’m pretty sure I finished my plate.

Being in the dark for so long, you end up distracted when a sliver of light peaks through from another room, even though it’s never enough to really see. You also are more aware of noise around you. We ate near a table of about six, who were obnoxiously loud (and using their outdoor voices). The couple at the table next to us was much quieter. At one point, someone broke a glass, and people started clapping. I have to say that’s one of my pet peeves: I find the clapping not only childish, but extremely rude in this circumstance. Anyway, the darkness took some getting used to, and also made us laugh quite a few times as we were trying to get used to it. At one point, the Engineer asked me if I was hunched over my plate like he was – and I realized that I was.

When we finally came back out, the dim light in the foyer was blindingly bright to us. It was like a completely different universe. The Engineer paid, we collected our things and we were on our way back into the bright early-afternoon sun to enjoy the rest of the day. It was a really great experience; I think everyone should try it at one point!


*I had been looking for a nickname for my husband, instead of his initial. I feel it has more appeal. After all, Petite Anglaise has The Boy (and Mr. Frog and Tadpole), while Gluten-Free Girl has the Chef (and Little Bean). So from now on, I will refer to my husband as the Engineer instead of J.

Thursday, February 12, 2009

Tarte impossible


Une recette rapide, dont j'ai déjà parlé sur mon site: la tarte impossible de ma mère. C'est hyper simple et économique, mais très satisfaisant. Il vous faut:
4 œufs battus
1/4 tasse de margarine
1/2 tasse de farine
2 tasses de lait
1 tasse de sucre
1 tasse de noix de coco râpée (non sucrée)
de la vanille (j'y vais au pif)
Vous devez: mélanger les ingrédients. Simple, non? Bon, ensuite vous versez le tout dans un moule graissé (je l'ai toujours fait dans un grand plat ovale) et vous mettez ça au four préchauffé à 350 °F. Faites cuire pendant une heure, jusqu'à ce que le dessus prenne une belle couleur dorée et que le centre soit ferme.
La farine se déposera au fond pour former la croûte; la noix de coco flottera sur le dessus pour former la garniture croustillante; le centre deviendra un onctueux remplissage.

Vous voyez, vous mettez vraiment tout dans un bol (les œufs et le lait sont sous mes ingrédients secs); puis vous mélangez. S'il reste de gros mottons de margarine, vous les écrasez à la fourchette, mais comme vous voyez dans la photo ci-dessous, ce n'est vraiment pas grave s'il en reste un peu.


Bon appétit!

Tuesday, February 10, 2009

Making baguettes

As I’ve said in a previous post, making bread (the kind that needs to be kneaded and rise) still totally intimidates me, but J. has gotten quite good at it. And last weekend, he made baguettes. I’ll give you the recipe and the technique, even though I almost feel like placing a disclaimer along the lines of “Don’t try this at home!” Or at least, this may not be the bread to try if you’ve never made bread before. But it was a fascinating process to watch nonetheless. This recipe is from Baking Illustrated.

We planned to eat the baguette for dinner on Sunday, so J. started making it on Saturday a bit after lunchtime – that’s how long it can take. Note that, unlike other breads, this bread first has dry dough that is kneaded with the addition of water to make it hold together (other breads have sticky dough that is kneaded with the addition of flour). Also, the dough is “crashed” against the counter to help it absorb the water properly – now that was both fun and easy. Watch the video I made! :) Please note that J. cut the dough in three pieces instead of two, due to the smaller size of our baking stone. The pan of water in the oven makes for a crispier crust.

Sponge
1/8 tsp instant yeast
¾ cup warm water (about 75 °F)
6 oz (1 cup + 3 tbsp) lower-protein unbleached all-purpose flour

Dough
½ tsp instant yeast
½ cup water (about 110 °F) + 2 tsp water if needed
10 oz (2 cups) lower-protein unbleached all-purpose flour
1 tsp salt

Glaze
1 egg white
1 tbsp water

For the sponge: Combine the yeast, water and flour in a medium bowl and stir together with a wooden spoon to form a thick batter. Scrape down the bowl with a rubber spatula. Cover the bowl with plastic wrap and punch a couple of holes in the plastic wrap with a paring knife; let stand at room temperature. After 5 to 6 hours, the sponge should be almost doubled in size and pitted with tiny bubbles. Refrigerate overnight, 12 to 14 hours; the surface will show a slight depression in the center, indicating the drop. The sponge is now ready to use.


For the dough: Add the yeast and 6 tbsp of the water to the sponge. Stir briskly with a wooden spoon until the water is incorporated, about 30 seconds. Stir in the flour and continue mixing with a wooden spoon until a scrappy ball forms. Turn the dough onto a work surface and knead by hand, adding drops of water if necessary, until the dry bits are absorbed into the dough, about 2 minutes. (The dough will feel dry and tough.)


Stretch the dough into a rough 8-by-6-inch rectangle, make indentations in the dough with your fingertips, sprinkle with 1 tbsp of the water, fold the edges of the dough up toward the center to enclose the water, and pinch the edges to seal. Knead the dough lightly, about 30 seconds. (The dough will feel slippery as some water escapes, but will become increasingly pliant as the water is absorbed.) Begin “crashing” the dough by flinging it against the work surface several times. (This process helps the dough absorb water more readily.) Knead and crash the dough alternately until it is soft and supple and the surface is almost powdery smooth, about 7 minutes. Stretch the dough again into a rough 8-by-6-inch rectangle and make indentations with your fingertips; sprinkle the dough with the salt and the remaining 1 tbsp of water. Repeat folding and sealing the edges and “crashing” and kneading until the dough is once again soft and supple and the surface is almost powdery smooth, about 7 minutes. If the dough still feels tough and nonpliant, knead in the additional 2 tsp of water.


Determine if the dough is adequately kneaded by performing a windowpane test: the dough should be stretched until it is nearly translucent. If the dough tears before stretching thin, knead 5 minutes longer and test again.


Gather the dough into a ball, place it in a lightly oiled bowl, and cover with plastic wrap. Let stand 30 minutes, then remove the dough from the bowl and knead gently to deflate, about 10 seconds; gather into a ball, return to the bowl, and replace the plastic wrap. Let rise until doubled in bulk, about 1 ½ hours.


Decompress the dough by gently pushing a fist in the center of the dough toward the bottom of the bowl; turn the dough onto a work surface. With a dough scraper, divide the dough into two 12-oz pieces. Working with one piece of dough at a time, covering the second piece with plastic wrap, cup your hands stiffly around the dough and drag it in short half-circular motions toward the edge of the work surface until the dough forms a rough torpedo shape with a taut, rounded surface, about 6 ½ inches long. (As you drag the dough, its tackiness will pull on the work surface, causing the top to scroll down and to the back to create a smooth, taut surface.) Repeat with the second piece of dough. Drape the plastic wrap over the dough on the work surface; let rest 15 to 20 minutes.

Meanwhile, cover an inverted rimmed baking sheet with parchment paper. Working with one piece of dough at a time, keeping the second piece covered in plastic wrap, shape the dough: Make an indentation along the length of the dough, with the side of an outstretched hand. Working along the length of the dough, press the thumb of one hand against the indentation while folding and rolling the upper edge of the dough down with the other hand to enclose the thumb. Repeat this process 4 or 5 times until the upper edge meets the lower edge and creates a deep seam. Using your fingertips, press the seam to seal. At this point, the dough will have formed a cylinder about 12 inches long. Roll the dough cylinder seam-side down; gently and evenly roll and stretch the dough until it measures 15 inches long by 2 ½ inches wide. Place seam-side down on the prepared baking sheet. Repeat with the second piece of dough. Space the shaped dough pieces about 6 inches apart on the baking sheet. Drape a clean dry kitchen towel over the dough and slide the baking sheet into a large clean plastic bag; seal to close. Refrigerate until the dough has slightly risen, 7 to 10 hours.


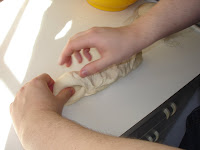


To glaze and bake: Adjust one oven rack to the lower-middle position and place a baking stone on the rack. Adjust the other rack to the lowest position and place a small empty baking pan on it. Heat the oven to 500 °F. Remove the baking sheet with the baguettes from the refrigerator and let the baguettes stand covered at room temperature 45 minutes; remove the plastic bag and towel to let the surface of the dough dry and let stand 15 minutes longer. The dough should have risen to almost double in bulk and feel springy to the touch. Meanwhile, bring 1 cup of water to a simmer in a small saucepan on the stovetop. Make the glaze by beating the egg white with the 1 tbsp of water.


With a very sharp knife (blade lightly sprayed with nonstick cooking spray), make five ¼-inch deep diagonal slashes on each baguette. Brush the baguettes with the egg white glaze and mist with water from a clean spray bottle. Working quickly, slide the parchment paper with the baguettes off the baking sheet and onto the hot baking stone. Pour the simmering water into the pan on the bottom rack, being careful to avoid the steam. Bake, rotating the loaves 90 ° after 10 minutes, until the crust is a deep golden brown, about 5 minutes longer (an instant-read thermometer inserted into the center of the loves through the bottom crust should read 205 °F to 210 °F). Transfer to a wire rack and let cool 30 minutes.


These baguettes were absolutely delicious! Note that they should be eaten within 2 hours after they are baked.